Contents
Managing presets
A preset is a set of tags generated by a user in arbitrary order or created automatically when an incident is registered. A set of tags in a custom preset can correspond to a certain aspect of the technological process or a section of the monitored asset.
In the Presets section, the left side of the window displays a list of available custom presets, and the right side of the window shows a list of tags included in the selected preset.
To view the received data on the graphs in the History and Monitoring sections, upload the preset configuration to Kaspersky MLAD from a JSON file. As part of Kaspersky MLAD deployment, a common preset configuration can be created for all users.
In the Presets section, you can also do the following:
- Create necessary presets that include tags corresponding to the industrial units of the monitored asset. The presets created by you are displayed only for your user account.
- Edit presets (add, group, or delete tags).
- Delete presets.
- Export presets to a JSON file.
You can also specify expressions with simple arithmetic operations (such as addition, subtraction, multiplication, and division) to calculate derived tag values.
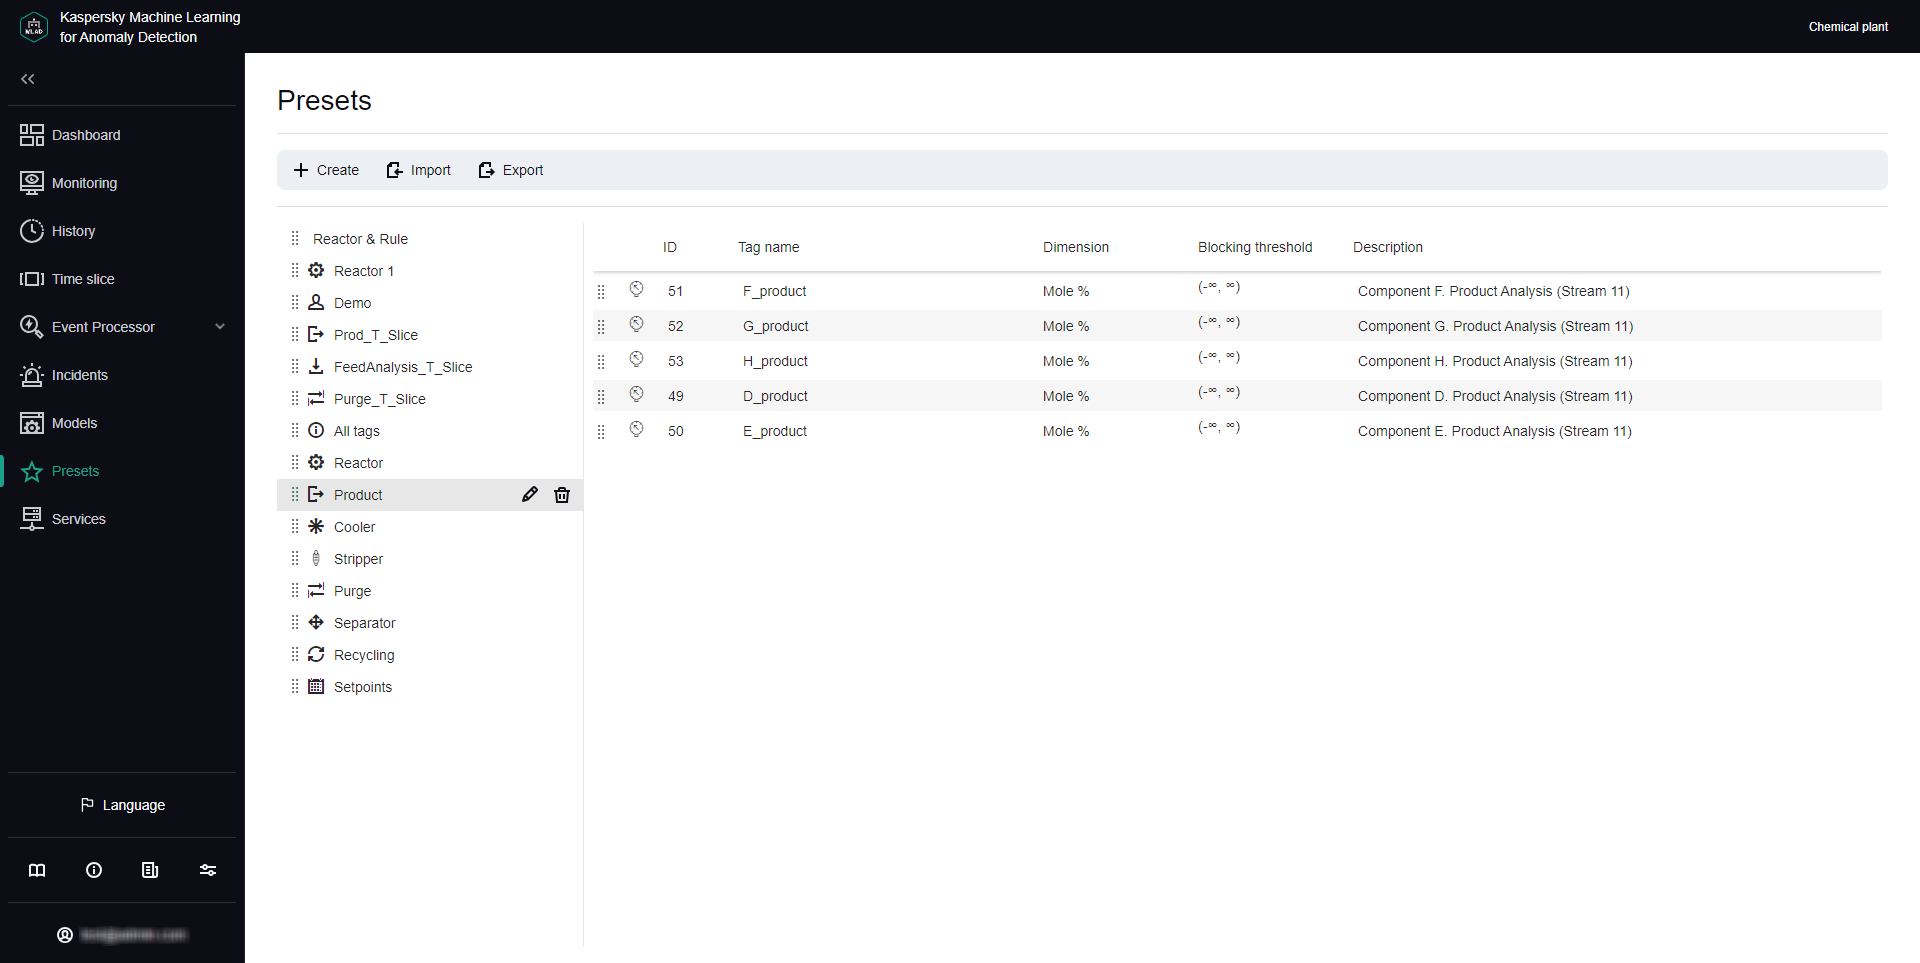
Presets section
Viewing a preset
You can view presets you created or uploaded to Kaspersky MLAD for your monitored asset.
To view a preset:
- In the main menu, select the Presets section.
The list of presets is displayed in the left part of the workspace.
- Click the relevant preset.
The table on the right shows the tags that are included in the selected preset. The following information is displayed for each tag included in the preset:
- ID refers to the tag ID.
- Tag name refers to the tag name.
- Dimension refers to the tag measurement units.
- Blocking threshold refers to the blocking thresholds; when these thresholds are reached, incidents are registered if the Limit Detector is enabled.
- Description refers to a description of the tag.
If necessary, you can change the preset or create a new preset.
Page topCreating a new preset
You can create new presets in Kaspersky MLAD.
When creating a preset, you can specify an expression to use for calculating the values of tags in the preset to display these values on the graph in the Time slice section. For example, you can use the specified expressions to view personal tag errors, predicted tag values, and the values of tags received from the monitored asset's sensors at the same time. You can use the following variables in your expressions:
- $tagValue is the received tag value (based on the results of monitoring).
- $tagError is the personal tag error.
- $tagPrediction is the predicted tag value.
- $tagX is the X coordinate of the monitored asset's sensor location specified when creating the tag.
- $tagY is the Y coordinate of the monitored asset's sensor location specified when creating the tag.
- $tagZ is the Z coordinate of the monitored asset's sensor location specified when creating the tag.
To create a new preset:
- In the main menu, select the Presets section and click the Create button.
The Create preset window opens.
- Specify the name of the preset in the Preset name field.
- If necessary, click the Choose icon button and select an icon for the preset in the opened window.
By default, the preset is assigned a sun icon (
 ).
).You can upload a preset icon by clicking the Load icon button. Images of any format larger than 128x128 pixels are shrunk to 128x128 while maintaining the aspect ratio. The size of the uploaded image in SVG format must not exceed 200 KB.
If you want to delete the preset icon, click the preset icon and then click Delete in the opened window.
- If you want to add an expression for calculating tag values to display them on a graph in the Time slice section, do the following:
- Turn on the Configure expressions for Time slice toggle switch.
- In the X-axis caption field, enter the caption to be displayed on the x-axis.
- Click the Add expression button and specify the following values in the drop-down section:
- In the Expression name field, enter the name of the expression.
- In the Y-axis caption field, enter the caption to be displayed on the y-axis.
- In the Expression for calculation field, enter an expression for calculating tag values.
You can define expressions with simple arithmetic operations (such as addition, subtraction, multiplication, and division). For example, if the sensors are reporting temperature in Fahrenheit, you can use the following expression to display the temperature in Celsius:
5/9 * ($tagValue - 32)
If necessary, you can add multiple expressions for the Time slice section.
- In the Graph color field, select the color of the graph that will be displayed for the preset in the Time slice section.
- If you want to delete an expression from a preset for the Time slice section, click the trash bin icon (
 ) in the lower-right corner of the expression section.
- If you need to add tags that are part of another preset, select this preset from the Copy tags from selected preset drop-down list.
- Add tags to the preset by selecting the check boxes next to the relevant tags in the asset tree below. You can search for tags by entering the tag name in the Search by tag name field.
- If you need to delete tags from a preset, clear the check boxes next to the tags you want to delete in the asset tree.
- Click the Save button.
The new preset is displayed in the Presets section in the list of presets on the left and in the drop-down list of presets in the History and Monitoring sections. The preset for which step 4 of these instructions was performed will also be displayed in the drop-down list of presets in the Time slice section.
If necessary, you can change the position of presets in the list of presets. To do this, drag the preset up or down in the list by the dots ( ) to the left of its icon.
Editing a preset
You can edit the presets you created or uploaded.
To edit a preset:
- In the main menu, select the Presets section.
- On the opened page, select the relevant preset from the list of presets on the left.
The table on the right shows all tags that are included in the selected preset.
If necessary, change the position of the tags in the table. To do this, drag the desired tag up or down in the asset tree by the dots (
) to the left of its icon. - Click the Change preset (
 ) button next to the selected preset.
The Edit preset window opens.
- If required, enter the new name of the preset in the Preset name field.
You can also modify the preset name in the preset list. To do this, double-click the preset name, in the opened field enter a new preset name, and press ENTER.
- If you need to change the preset icon, click the Choose icon button and select the appropriate icon in the opened window.
You can upload a preset icon by clicking the Load icon button. Images of any format larger than 128x128 pixels are shrunk to 128x128 while maintaining the aspect ratio. The size of the uploaded image in SVG format must not exceed 200 KB.
If you want to delete the preset icon, click the preset icon and then click Delete in the opened window.
- If you want to add an expression for calculating tag values to display them on a graph in the Time slice section, do the following:
- Turn on the Configure expressions for Time slice toggle switch.
- In the X-axis caption field, enter the caption to be displayed on the x-axis.
- Click the Add expression button and specify the following values in the drop-down section:
- In the Expression name field, enter the name of the expression.
- In the Y-axis caption field, enter the caption to be displayed on the y-axis.
- In the Expression for calculation field, enter an expression for calculating tag values.
You can define expressions with simple arithmetic operations (such as addition, subtraction, multiplication, and division). For example, if the sensors are reporting temperature in Fahrenheit, you can use the following expression to display the temperature in Celsius:
5/9 * ($tagValue - 32)
If necessary, you can add multiple expressions for the Time slice section.
- In the Graph color field, select the color of the graph that will be displayed for the preset in the Time slice section.
- To delete an expression from a preset for the Time slice section, click the trash bin icon () in the lower-right corner of the expression section.
- If necessary, add tags to the preset by selecting the check boxes next to the relevant tags in the list of tags below. You can search for tags by entering the tag name in the Search by tag name field.
- If necessary, clear the check boxes next to the names of the tags that you want to remove from the preset.
- Click the Save button.
The changed preset will be updated in the list of presets in the Presets section and in the drop-down list of presets in the History and Monitoring sections. The changed preset for which step 6 of these instructions was performed will also be displayed in the drop-down list of presets in the Time slice section.
If necessary, you can change the position of presets in the list of presets. To do this, drag the preset up or down in the list by the dots () to the left of its icon.
Deleting a preset
You can delete the presets you created or uploaded.
To delete a preset:
- In the main menu, select the Presets section.
- On the opened page, select the relevant preset from the list of presets on the left.
- Click the Delete preset (
 ) button next to the selected preset.
 - In the opened Delete preset window, click Yes to confirm deletion of the preset.
The preset will be deleted from the list of presets.
Page topLoading a preset configuration from a file
You can load a preset configuration to Kaspersky MLAD from a JSON file.
To upload a preset configuration to Kaspersky MLAD:
- In the main menu, select the Presets section.
- In the upper part of the opened page, click the Import button.
- Select the JSON file containing the preset configuration on your local drive.
The selected file will be loaded into Kaspersky MLAD, and new presets will be displayed in the list of presets.
Page topSaving a preset configuration to a file
You can save the presets you created and uploaded to Kaspersky MLAD as a JSON file.
To save the presets you created and uploaded to Kaspersky MLAD to a file:
- In the main menu, select the Presets section.
- In the upper part of the opened page, click the Export button.
The presets you created and uploaded to Kaspersky MLAD will be saved to a JSON file on the local drive.
Page top