Contents
- Managing tasks
- About tasks
- About task scope
- Creating a task
- Starting a task manually
- Starting a task for selected devices
- Viewing the task list
- General task settings
- Exporting a task
- Importing a task
- Starting the Change tasks password wizard
- Viewing task run results stored on the Administration Server
- Manual setup of the group task for scanning a device with Kaspersky Endpoint Security
- General task settings
About tasks
Open Single Management Platform manages Kaspersky security applications installed on devices by creating and running tasks. Tasks are required for installing, launching, and stopping applications, scanning files, updating databases and software modules, and performing other actions on applications.
Tasks for a specific application can be created using OSMP Console only if the management plug-in for that application is installed on OSMP Console Server.
Tasks can be performed on the Administration Server and on devices.
The tasks that are performed on the Administration Server include the following:
- Automatic distribution of reports
- Downloading of updates to the repository
- Backup of Administration Server data
- Maintenance of the database
The following types of tasks are performed on devices:
- Local tasks—Tasks that are performed on a specific device
Local tasks can be modified either by the administrator, using OSMP Console, or by the user of a remote device (for example, through the security application interface). If a local task has been modified simultaneously by the administrator and the user of a managed device, the changes made by the administrator will take effect because they have a higher priority.
- Group tasks—Tasks that are performed on all devices of a specific group
Unless otherwise specified in the task properties, a group task also affects all subgroups of the selected group. A group task also affects (optionally) devices that have been connected to secondary and virtual Administration Servers deployed in the group or any of its subgroups.
- Global tasks—Tasks that are performed on a set of devices, regardless of whether they are included in any group.
For each application, you can create any number of group tasks, global tasks, or local tasks.
You can make changes to the settings of tasks, view the progress of tasks, and copy, export, import, and delete tasks.
A task is started on a device only if the application for which the task was created is running.
Execution results of tasks are saved in the operating system event log on each device, in the operating system event log on the Administration Server, and in the Administration Server database.
Do not include private data in task settings. For example, avoid specifying the domain administrator password.
Page topAbout task scope
The scope of a task is the set of devices on which the task is performed. The types of scope are as follows:
- For a local task, the scope is the device itself.
- For an Administration Server task, the scope is the Administration Server.
- For a group task, the scope is the list of devices included in the group.
When creating a global task, you can use the following methods to specify its scope:
- Specifying certain devices manually.
You can use an IP address (or IP range) or DNS name as the device address.
- Importing a list of devices from a .txt file with the device addresses to be added (each address must be placed on an individual line).
If you import a list of devices from a file or create a list manually, and if devices are identified by their names, the list can only contain devices for which information has already been entered into the Administration Server database. Moreover, the information must have been entered when those devices were connected or during device discovery.
- Specifying a device selection.
Over time, the scope of a task changes as the set of devices included in the selection change. A selection of devices can be made on the basis of device attributes, including software installed on a device, and on the basis of tags assigned to devices. Device selection is the most flexible way to specify the scope of a task.
Tasks for device selections are always run on a schedule by the Administration Server. These tasks cannot be run on devices that lack connection to the Administration Server. Tasks whose scope is specified by using other methods are run directly on devices and therefore do not depend on the device connection to the Administration Server.
Tasks for device selections are not run on the local time of a device; instead, they are run on the local time of the Administration Server. Tasks whose scope is specified by using other methods are run on the local time of a device.
Creating a task
To create a task:
- In the main menu, go to Assets (Devices) → Tasks.
- Click Add.
The New task wizard starts. Follow its instructions.
- If you want to modify the default task settings, enable the Open task details when creation is complete option on the Finish task creation page. If you do not enable this option, the task is created with the default settings. You can modify the default settings later, at any time.
- Click the Finish button.
The task is created and displayed in the list of tasks.
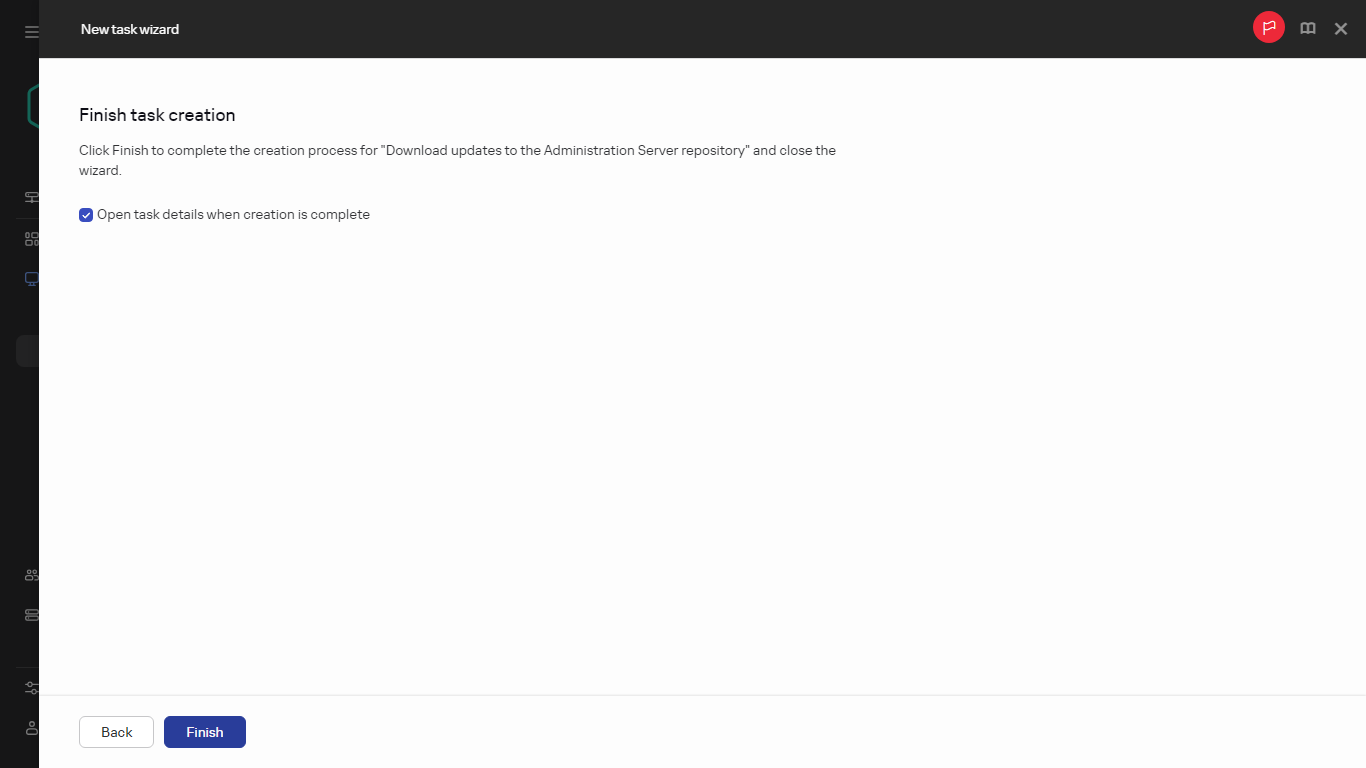
Finishing task creation
To create a new task assigned to the selected devices:
- In the main menu, go to Assets (Devices) → Managed devices.
The list of managed devices is displayed.
- In the list of managed devices, select check boxes next to the devices to run the task for them. You can use the search and filter functions to find the devices you're looking for.
- Click the Run task button, and then select Add a new task.
The New task wizard starts.
On the first step of the wizard, you can remove the devices selected to include in the task scope. Follow the wizard instructions.
- Click the Finish button.
The task is created for the selected devices.
Starting a task manually
The application starts tasks according to the schedule settings specified in the properties of each task. You can start a task manually at any time from the task list. Alternatively, you can select devices in the Managed devices list, and then start an existing task for them.
To start a task manually:
- In the main menu, go to Assets (Devices) → Tasks.
- In the task list, select the check box next to the task that you want to start.
- Click the Start button.
The task starts. You can check the task status in the Status column or by clicking the Result button.
Starting a task for selected devices
You can select one or more client devices in the list of devices, and then launch a previously created task for them. This allows you to run tasks created earlier for a specific set of devices.
This changes the devices to which the task was assigned to the list of devices that you select when you run the task.
To start a task for selected devices:
- In the main menu, go to Assets (Devices) → Managed devices. The list of managed devices is displayed.
- In the list of managed devices, use the check boxes to select the devices to run the task for them. You can use the search and filter functions to find the devices you're looking for.
- Click the Run task button, and then select Apply existing task.
The list of the existing tasks is displayed. - The selected devices are displayed above the task list. If necessary, you can remove a device from this list. You can delete all but one device.
- Select the desired task in the list. You can use the search box above the list to search for the desired task by name. Only one task can be selected.
- Click Save and start task.
The selected task is immediately started for the selected devices. The scheduled start settings in the task are not changed.
Page topViewing the task list
You can view the list of tasks that are created in Open Single Management Platform.
To view the list of tasks,
In the main menu, go to Assets (Devices) → Tasks.
The list of tasks is displayed. The tasks are grouped by the names of applications to which they are related. For example, the Install application remotely task is related to the Administration Server, and the Update task refers to Kaspersky Endpoint Security.
To view properties of a task,
Click the name of the task.
The task properties window is displayed with several named tabs. For example, the Task type is displayed on the General tab, and the task schedule—on the Schedule tab.
Page topGeneral task settings
This section contains the settings that you can view and configure for most of your tasks. The list of settings available depends on the task you are configuring.
Settings specified during task creation
You can specify the following settings when creating a task. Some of these settings can also be modified in the properties of the created task.
- Operating system restart settings:
- Task scheduling settings:
The types of schedule may vary depending on the task.
Some types of schedule may be unavailable for other Kaspersky applications.
- Devices to which the task will be assigned:
- Account settings:
Settings specified after task creation
You can specify the following settings only after a task is created.
- Group task settings:
- Advanced scheduling settings:
- Notification settings:
- Store task history block:
- Notify administrator of task execution results
- Notify of errors only
- Security settings.
- Task scope settings.
Depending on how the task scope is determined, the following settings are present:
- Revision history.
Exporting a task
Open Single Management Platform allows you to save a task and its settings to a KLT file. You can use this KLT file to import the saved task both to Kaspersky Security Center Windows and Kaspersky Security Center Linux.
To export a task:
- In the main menu, go to Assets (Devices) → Tasks.
- Select the check box next to the task that you want to export.
You cannot export multiple tasks at the same time. If you select more than one task, the Export button will be disabled. Administration Server tasks are also unavailable for export.
- Click the Export button.
- In the opened Save as window, specify the task file name and path. Click the Save button.
The Save as window is displayed only if you use Google Chrome, Microsoft Edge, or Opera. If you use another browser, the task file is automatically saved in the Downloads folder.
Importing a task
Open Single Management Platform allows you to import a task from a KLT file. The KLT file contains the exported task and its settings.
To import a task:
- In the main menu, go to Assets (Devices) → Tasks.
- Click the Import button.
- Click the Browse button to choose a task file that you want to import.
- In the opened window, specify the path to the KLT task file, and then click the Open button. Note that you can select only one task file.
The task processing starts.
- After the task is processed successfully, select the devices to which you want to assign the task. To do this, select one of the following options:
- Specify the task scope.
- Click the Complete button to finish the task import.
The notification with the import results appears. If the task is imported successfully, you can click the Details link to view the task properties.
After a successful import, the task is displayed in the task list. The task settings and schedule are also imported. The task will be started according to its schedule.
If the newly imported task has an identical name to an existing task, the name of the imported task is expanded with the (<next sequence number>) index, for example: (1), (2).
Page topStarting the Change tasks password wizard
For a non-local task, you can specify an account under which the task must be run. You can specify the account during task creation or in the properties of an existing task. If the specified account is used in accordance with security instructions of the organization, these instructions might require changing the account password from time to time. When the account password expires and you set a new one, the tasks will not start until you specify the new valid password in the task properties.
The Change tasks password wizard enables you to automatically replace the old password with the new one in all tasks in which the account is specified. Alternatively, you can change this password manually in the properties of each task.
To start the Change tasks password wizard:
- In the main menu, go to Assets (Devices) → Tasks.
- Click Manage credentials of accounts for starting tasks.
Follow the instructions of the wizard.
Step 1. Specifying credentials
Specify new credentials that are currently valid in your system. When you switch to the next step of the wizard, Open Single Management Platform checks if the specified account name matches the account name in the properties of each non-local task. If the account names match, the password in the task properties will be automatically replaced with the new one.
To specify the new account, select an option:
If you fill in the Previous password (optional; if you want to replace it with the current one) field, Open Single Management Platform replaces the password only for those tasks in which both the account name and the old password are found. The replacement is performed automatically. In all other cases you have to choose an action to take in the next step of the wizard.
Step 2. Selecting an action to take
If you did not specify the previous password in the first step of the wizard or if the specified old password has not matched the passwords in the task properties, you must choose an action to take for the tasks found.
To choose an action for a task:
- Select the check box next to the task for which you want to choose an action.
- Perform one of the following:
- To remove the password in the task properties, click Delete credentials.
The task is switched to run under the default account.
- To replace the password with a new one, click Enforce the password change even if the old password is wrong or not provided.
- To cancel the password change, click No action is selected.
- To remove the password in the task properties, click Delete credentials.
The chosen actions are applied after you move to the next step of the wizard.
Step 3. Viewing the results
On the last step of the wizard, view the results for each of the found tasks. To complete the wizard, click the Finish button.
Viewing task run results stored on the Administration Server
Open Single Management Platform allows you to view the results for group tasks, tasks for specific devices, and Administration Server tasks.
To view the task results:
- In the task properties window, select the General section.
- Click the Results link to open the Task results window.
To view task results for a secondary Administration Server:
- In the task properties window, select the General section.
- Click the Results link to open the Task results window.
- Click Statistics from secondary Servers.
- Select the secondary Server for which you want to display the Task results window.
Manual setup of the group task for scanning a device with Kaspersky Endpoint Security
The quick start wizard creates a group task for scanning a device. If the automatically specified schedule of the group scanning task is not appropriate for your organization, you must manually set up the most convenient schedule for this task based on the workplace rules adopted in the organization.
For example, the task is assigned a Run on Fridays at 7:00 PM schedule with automatic randomization, and the Run missed tasks check box is cleared. This means that if the devices in the organization are shut down on Fridays, for example, at 6:30 PM, the device scan task will never run. In this case you need to set up the group scanning task manually.
General task settings
This section contains the settings that you can view and configure for most of your tasks. The list of settings available depends on the task you are configuring.
Settings specified during task creation
You can specify the following settings when creating a task. Some of these settings can also be modified in the properties of the created task.
- Operating system restart settings:
- Task scheduling settings:
The types of schedule may vary depending on the task.
Some types of schedule may be unavailable for other Kaspersky applications.
- Devices to which the task will be assigned:
- Account settings:
Settings specified after task creation
You can specify the following settings only after a task is created.
- Group task settings:
- Advanced scheduling settings:
- Notification settings:
- Store task history block:
- Notify administrator of task execution results
- Notify of errors only
- Security settings.
- Task scope settings.
Depending on how the task scope is determined, the following settings are present:
- Revision history.