Contents
- System administrator tasks
- Managing user accounts
- Manage roles
- Managing incident notifications
- Configuring Kaspersky MLAD
- Configuring the main settings of Kaspersky MLAD
- Configuring the security settings of Kaspersky MLAD
- Configuring the Anomaly Detector service
- Configuring the Keeper service
- Configuring the Mail Notifier service
- Configuring the Similar Anomaly service
- Configuring the Stream Processor service
- Configuring the HTTP Connector
- Configuring the MQTT Connector
- Configuring the AMQP Connector
- Configuring the OPC UA Connector
- Configuring the KICS Connector
- Configuring the CEF Connector
- Configuring the WebSocket Connector
- Configuring the Event Processor service
- Configuring the statuses and causes of incidents
- Configuring logging for Kaspersky MLAD services
- Configuring time intervals for displaying data
- Configuring how the Kaspersky MLAD menu items are displayed
- Export and import of Kaspersky MLAD settings
- Managing assets and tags
- About monitored asset hierarchical structure
- About tags
- Create asset
- Change asset settings
- Create tag
- Adding a tag to an asset
- Editing a tag
- Moving assets and tags
- Deleting an asset or tag
- Checking the current structure of tags
- Uploading tag and asset configuration to the system
- Saving tag and asset configuration to a file
System administrator tasks
This section contains a description of the system administrator tasks performed in the administrator menu of the application.
Managing user accounts
To ensure that users securely work with Kaspersky MLAD, create an account for each user.
Kaspersky MLAD user accounts can be managed only by system administrators.
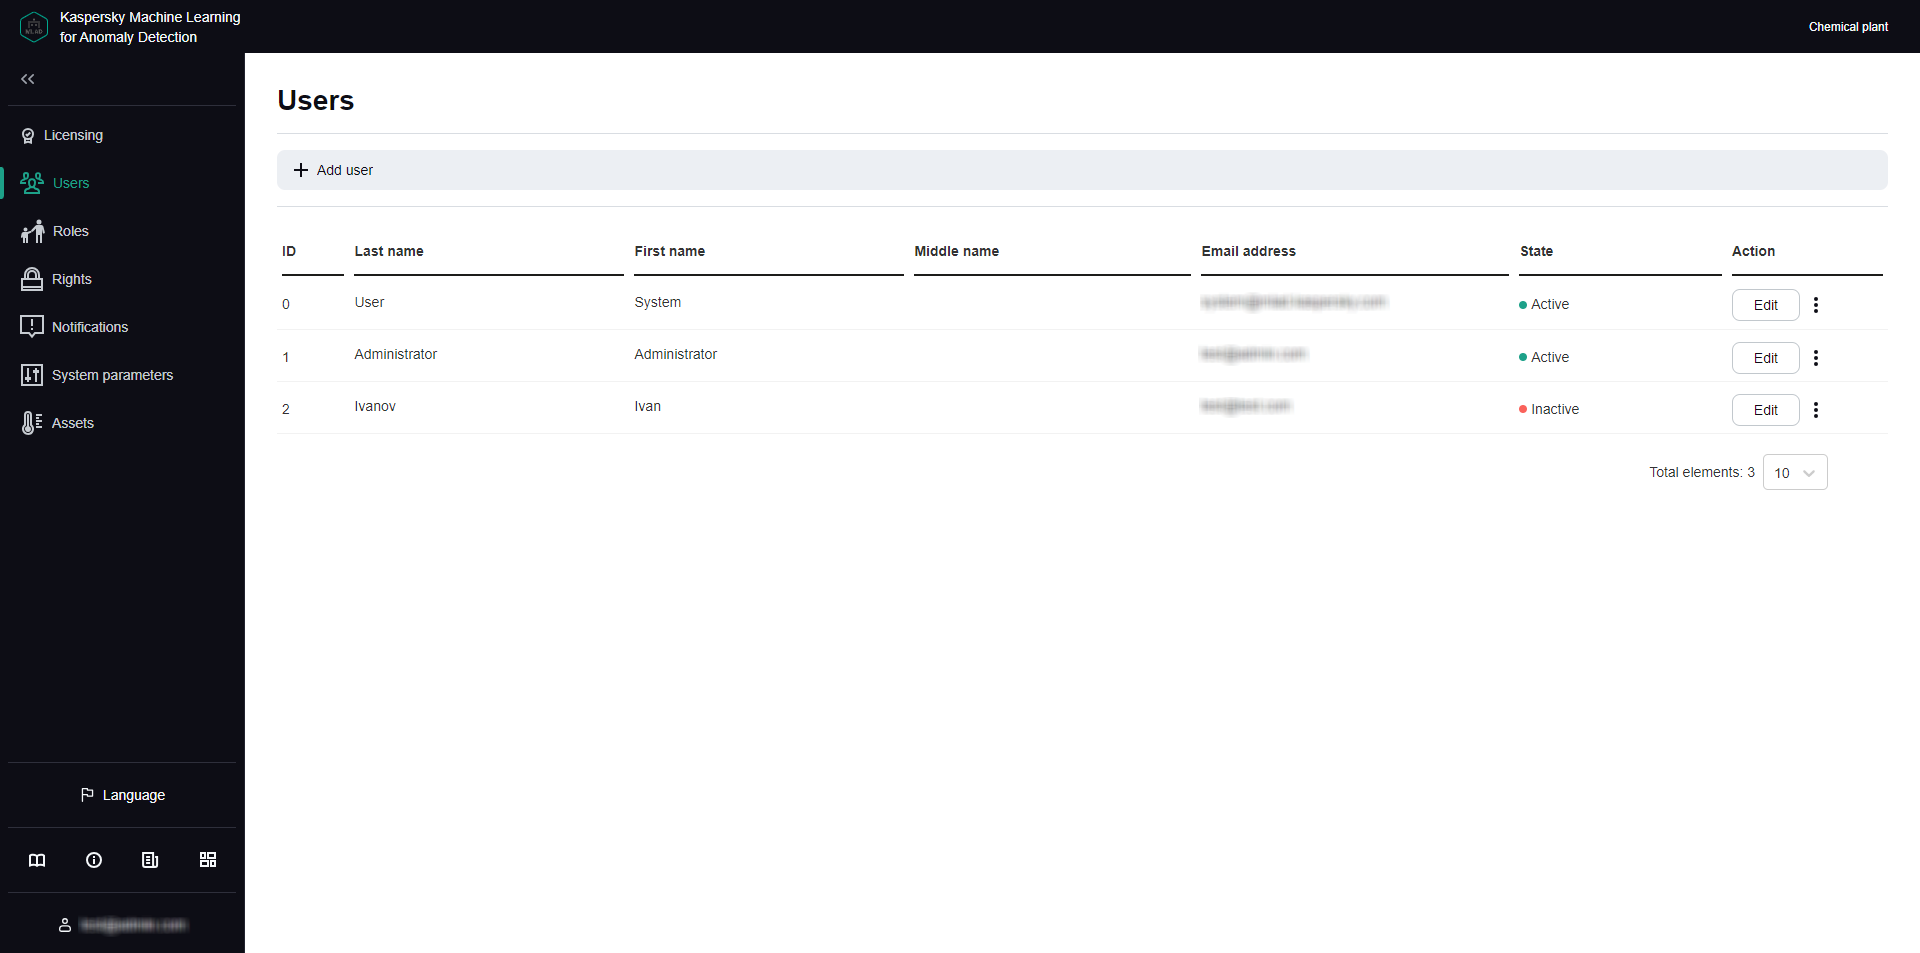
All created user accounts and information about them are displayed in the table tn the Users section of the administrator menu.
When installing the application, a special User System account is created. This account is not intended for use by personnel when working with Kaspersky MLAD. This account cannot be used to connect to the application web interface. To clarify whether or not you can change its settings, you are advised to consult with Kaspersky experts or a certified integrator.
You can modify user accounts as needed. Kaspersky MLAD does not allow you to delete user accounts. To prevent a specific account from accessing Kaspersky MLAD web interface, it is recommended to block this account. You can unblock this user account later if necessary. If an account was locked when the number of unsuccessful login attempts for that user was reached, you can unblock this account before the blocking period expires. You can specify the number of unsuccessful authorization attempts and the account blocking period when configuring the security settings of Kaspersky MLAD.
Next to each account, there is a vertical menu  that lets you revoke authentication tokens or view the list of rights for the specific user account.
Users section
Creating a user account
Kaspersky MLAD user accounts can be managed only by system administrators.
To create a user account:
- In the lower-left corner of the window, click
 .
.You will be taken to the administrator menu.
- Select the Users section.
- Click the Add user button.
The Add user panel appears on the right.
- In the Last name field, enter the last name of the user.
- In the Name field, enter the first name of the user.
- If necessary, enter the middle name of the user in the Middle name field.
- In the Email address field, enter the email address of the user.
- In the Password field, enter a password for the user account.
The password must meet the following requirements:
- Must contain the minimum number of characters defined in the Minimum password length setting.
- Must contain letters of the English alphabet, numerals and/or special characters in accordance with the password policy that was set when configuring the security settings.
- In the Confirm password field, type the password again to confirm the password for the user account.
- Click the Save button.
Information about the new user will be displayed in the table. If necessary, you can modify user accounts and revoke their authentication tokens
When creating an account, you cannot assign a role to a user. You can assign a role to a user only when editing the user account.
Page topEditing a user account
Kaspersky MLAD user accounts can be managed only by system administrators.
When you edit a user account, you can assign the desired role to the user. You can also block or unblock a user account.
When a user is blocked in Kaspersky MLAD, their authentication tokens are automatically revoked, and their user sessions are terminated. A blocked user cannot log in to Kaspersky MLAD to use the application.
If the password for a user account is changed, Kaspersky MLAD also revokes authentication tokens automatically and terminates the user session of the user account whose password was changed. A user whose password has been changed can log in to the web interface with the updated password.
To edit a user account:
- In the lower-left corner of the window, click .
You will be taken to the administrator menu.
- Select the Users section.
- Click the Edit button in the row of the user account that you want to edit.
The Edit user pane appears on the right.
- Enter the user's new last name, first name, and/or middle name, if needed.
- In the Roles field, assign a role for the user account by selecting the corresponding check box.
- If required, enter the user's new email address.
- If you need to change the password, enter the new password in the Password and Confirm password fields.
The new password must meet the following requirements:
- Must not match previously used passwords. The specific number of most recently used passwords that must not be reused is defined by the value of the Number of user passwords stored in history setting.
- Must contain the minimum number of characters defined in the Minimum password length setting.
- Must contain letters of the English alphabet, numerals and/or special characters in accordance with the password policy that was set when configuring the security settings.
- If you want to block or unblock a user account, perform one of the following actions:
- If you want to unblock a user account, set the State toggle switch to the Active position.
- If you want to block a user account, set the State toggle switch to the Inactive position.
Kaspersky MLAD does not allow you to delete user accounts. If you want to prevent a specific user account from accessing Kaspersky MLAD, it is recommended to block this user account.
- Click the Save button.
The updated information about the user will be displayed in the table.
Page topRevoking authentication tokens for a user account
Kaspersky MLAD user accounts can be managed only by system administrators.
After a user connects to the Kaspersky MLAD web interface, an individualized token is created so that the user authorization in the application can be saved between connection sessions to the application web interface, including when the browser is restarted. If a user is authorized on multiple assets, a token is created for each user session.
If necessary, you can revoke tokens for a user account at any time. For the user whose tokens are revoked, the connection session is terminated simultaneously on all assets where they were authorized. Revoking tokens may be useful if you need to immediately terminate application connection sessions for a specific user. After the tokens are revoked, the user can log in again and continue using Kaspersky MLAD.
To revoke tokens for a user account:
- In the lower-left corner of the window, click .
You will be taken to the administrator menu.
- Select the Users section.
- Open the vertical menu next to the account you want to revoke tokens from, and select Revoke tokens.
- In the window that opens, confirm that you want to revoke the authentication tokens.
The user account tokens are revoked, and the user session is terminated.
Page topViewing access rights for a user account
Kaspersky MLAD user accounts can be managed only by system administrators.
In the Users section, you can view the list of rights for a specific user account.
To view the access rights for a user account:
- In the lower-left corner of the window, click .
You will be taken to the administrator menu.
- Select the Users section.
- Open the vertical menu next to the account you want to view the list of permissions for, and select List of rights.
The page displays a window containing information about the role and access rights of the selected user account.
Page topManage roles
In Kaspersky MLAD, you can use common roles to restrict user access to application functions depending on the tasks performed by specific users.
Role management is available to system administrators.
A role is a set of rights to access application functions that you can assign to a user.
Accounts with the following roles can be used to access application functions:
- The system administrator role is created automatically during installation of the application. The system administrator role is automatically assigned to the first user created during installation of Kaspersky MLAD. A user with the system administrator role has access to all functions of the application. The system administrator role cannot be modified or removed.
- A custom role is created manually in the Roles section. Access to application functions depends on the list of rights granted to the custom role. The number of user roles is unlimited.
The Roles section displays a table with information about all created roles.
Creating role
Role management is available to system administrators.
You can create custom roles and select the access rights to application functions for them. After an active role is created, it will become available for assignment to application users.
To create a role:
- In the lower-left corner of the window, click .
You will be taken to the administrator menu.
- Select the Roles section.
- Click the Create button.
The Creating role pane appears on the right.
- In the Role name field, specify the required role name.
You can enter up to 30 characters.
- If necessary, enter a new description for the tag in the Role description field.
- To grant access rights to a role, do the following:
- Click the Select rights button.
The Grant rights to role pane appears on the right.
- In the list of rights, select the access rights to application functions that you want to grant to the role.
When you select Rights to all actions, all system administrator functions will be available to the role.
- Click the Save button.
- Click the Select rights button.
- Perform one of the following actions:
- If you need to use a role for application users, set the State switch to the Active position.
- If you need to disable the use of a role for application users, set the State toggle switch to the Inactive position.
If a role is inactive, the features associated with the role's permissions are unavailable to the user assigned to that role.
- Click the Save button.
Editing role
Role management is available to system administrators.
To change a role:
- In the lower-left corner of the window, click .
You will be taken to the administrator menu.
- Select the Roles section.
- Check the box next to the role you want to edit.
- Click the Edit button.
The Editing role pane appears on the right.
- Edit the role settings. For a description of the settings, see the instructions on creating a role.
- Click the Save button.
Deleting role
Role management is available to system administrators.
When a user role assigned to Kaspersky MLAD users is deleted, those users will lose access to the features associated with that role.
System administrator role cannot be deleted.
To delete a role:
- In the lower-left corner of the window, click .
You will be taken to the administrator menu.
- Select the Roles section.
- Select the check boxes next to the names of the roles that you want to remove.
- Click the Delete button.
- In the window that opens, confirm that you want to delete the roles.
Viewing access rights for a role
Role management is available to system administrators.
In the Roles section, you can view a list of access rights to application functions for users with a specific role.
To view the access rights for a role:
- In the lower-left corner of the window, click .
You will be taken to the administrator menu.
- Select the Roles section.
- Click the List of rights button next to the role for which you want to view the list of rights.
A window opens on the page with information about access rights to application functions for the selected role.
Managing incident notifications
You can set up notifications for Kaspersky MLAD to send to users about incidents identified through the analysis of telemetry data or from ML model output. Notifications are sent to the email addresses specified in the notifications. You can edit and delete notifications regarding incidents for Kaspersky MLAD users.
Only system administrators can manage incident notifications.
The Mail Notifier service must be configured and started in advance.
All created notifications about incidents and information about them are displayed in the Notifications section in the administrator menu. If necessary, you can change the number of notifications displayed on one page.
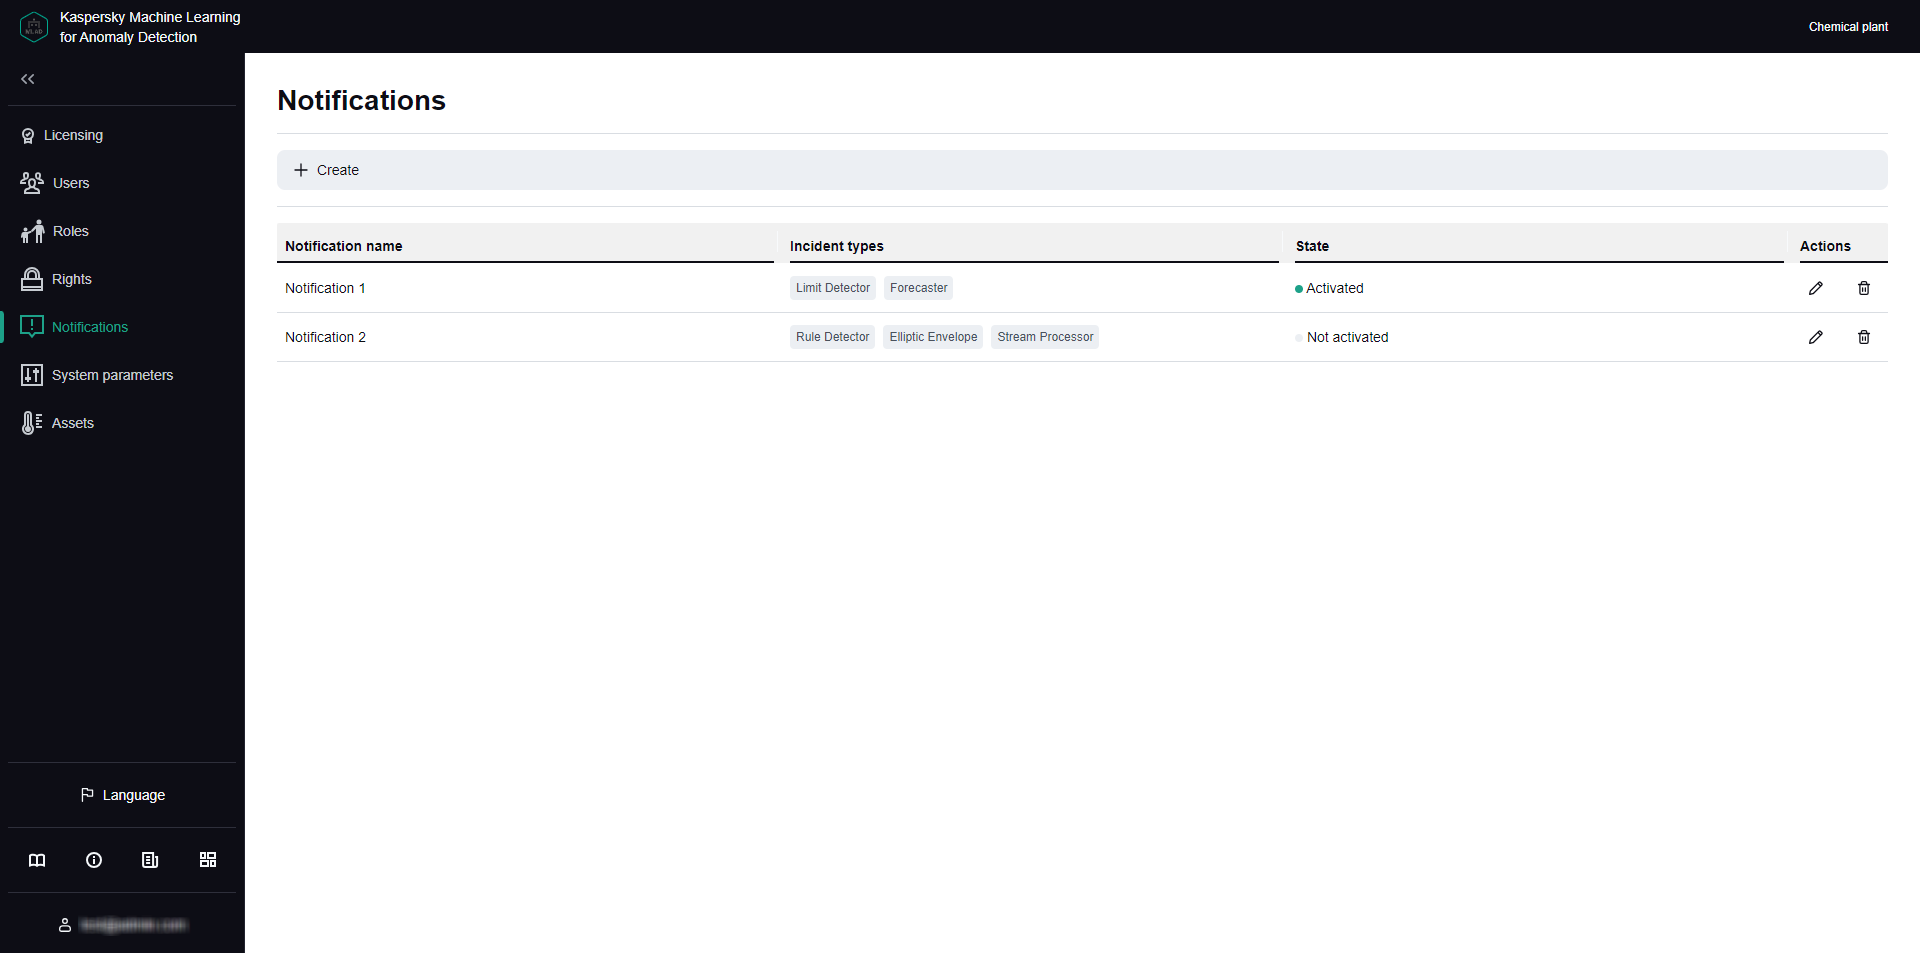
Notifications section
Creating an incident notification
Only system administrators can manage incident notifications.
You can create notifications about incidents recorded during telemetry data processing and/or as a result of ML model operation.
To create an incident notification for a user:
- In the lower-left corner of the window, click .
You will be taken to the administrator menu.
- Select the Notifications section.
- On the opened page, click the Create button.
The Create notification window opens.
- Specify the name of the notification in the Name field.
- To enable sending of notifications, set the State toggle switch to the Activated position.
- In the Notification language field, select the language of the delivered incident notifications.
By default, the current localization language of the Kaspersky MLAD web interface is used for incident notifications. It is available in English and Russian.
- In the Users email addresses drop-down list, select the email addresses of the application users to send notifications to.
- In the Additional email addresses field, specify additional email addresses to send incident notifications to, separated with a semicolon.
- To enable notifications about incidents registered by ML models, do the following:
- To configure notifications about incidents registered by predictive elements of ML models, select Predictive elements.
- To configure notifications about incidents registered by ML model diagnostic rules, select Rules.
- To configure notifications about incidents registered by elliptic envelopes of ML models, select the Elliptic envelopes check box.
- Select one or more ML models to send notifications for.
To select all ML models within an asset, check the box next to the asset name.
- To enable notifications about incidents registered only by published ML models, set Send incident notifications for published models only to Activated.
- To enable incident notifications for tags:
- To configure notifications for when a tag has reached an upper or lower blocking threshold, select Limit Detector.
- If you want to configure sending of the notifications about the termination or interruption of the input data stream for a specific tag, or about the detection of observations that arrived too soon or too late, select the Stream Processor check box.
- Select one or more tags you want to send notifications for.
To select all tags within an asset, check the box next to the asset name.
- Click the Save button.
Information about the new notification will be displayed in the table. If necessary, you can edit or delete notifications.
A separate notification will be sent to the specified email addresses for each incident registered for selected ML models and/or tags.
Page topEditing an incident notification
Only system administrators can manage incident notifications.
To edit an incident notification:
- In the lower-left corner of the window, click .
You will be taken to the administrator menu.
- Select the Notifications section.
- Click the
 button next to the notification that you want to edit.
 - Adjust the incident notification settings, if needed. For a description of the settings, see the instructions on setting up an incident notification.
- Click the Save button to save the changes.
A separate notification will be sent to the specified email addresses for each incident registered for selected ML models and/or tags.
The updated information about the notification will be displayed in the table. If necessary, you can delete notifications.
Page topDeleting an incident notification
Only system administrators can manage incident notifications.
To delete an incident notification:
- In the lower-left corner of the window, click .
You will be taken to the administrator menu.
- Select the Notifications section.
- Click the
 button next to the notification that you want to delete.
 - In the window that opens, confirm the deletion of the notification.
Information about the notification will be deleted from the table.
Kaspersky MLAD allows you to temporarily disable sending of notifications instead of deleting their configuration. Information about notifications is saved in the Notifications section. You can enable sending of notifications at any time. You can enable or disable notifications by editing the corresponding incident notification.
Page topConfiguring Kaspersky MLAD
This section contains instructions on configuring the settings of Kaspersky MLAD services and connectors, as well as on configuring security settings, logging levels for application services, settings for displaying the application menu, and on managing typical statuses and causes of incidents.
Configuring the main settings of Kaspersky MLAD
Kaspersky MLAD lets you specify the name of the monitored asset, web address and IP address for connecting users to the application web interface, and the frequency of receiving new data from the monitored asset. The name of the monitored asset will be displayed in the upper right corner of each section of the Kaspersky MLAD web interface.
System administrators can configure the main settings of Kaspersky MLAD.
To configure the main settings of Kaspersky MLAD:
- In the lower-left corner of the window, click .
You will be taken to the administrator menu.
- Select the System parameters → Main section.
A list of options appears on the right.
- In the Name of monitored asset field, specify the name of the monitored asset.
- In URL address for incident notifications, specify a URL for generating a link to incidents in email incident alerts.
If IP address for incident notifications is set, this is used for generating the link.
- In IP address for incident notifications, specify an IP for generating a link to incidents in email incident alerts.
- In the Interval for receiving data from the Message Broker service (ms) field, specify the interval for updating telemetry data in the application web interface.
The higher the specified parameter value, the less frequently the data is updated. The default value of this parameter is
500. - In the Interval for receiving incident statistics from the database (ms) field, indicate how frequently data on incidents registered by the application should be updated in the application web interface.
The default value of this parameter is
5000. - In the Monitored asset time zone drop-down list, select the time zone of the computer where Kaspersky MLAD is installed
The graphs in the application show data in the time zone you select.
- Click the Save button.
Configuring the security settings of Kaspersky MLAD
Kaspersky MLAD lets you specify the conditions for temporarily blocking user accounts, the user inactivity period in accordance with the enterprise security policy, and the settings for storing information security event logs in the Kaspersky MLAD database. Information security event logs are automatically written to the database. If necessary, you can specify the settings of an external system to which the information security event logs should be sent.
System administrators may be responsible for configuring the security settings of Kaspersky MLAD.
To configure the main settings of Kaspersky MLAD:
- In the lower-left corner of the window, click .
You will be taken to the administrator menu.
- Select the System parameters → Security section.
A list of options appears on the right.
- In the Authorization parameters block, do the following:
- In the Number of authentication attempts field, specify the number of unsuccessful authorization attempts. When this number is reached, Kaspersky MLAD temporarily blocks the corresponding user account.
The default value of this parameter is
3. - In the User lock duration (sec) field, specify the time period (in seconds) to block a user account after reaching the specified number of unsuccessful authorization attempts.
The default value of this parameter is
120. - In the User inactivity period (min) field, specify the permissible duration of an inactive user session (in minutes).
When the specified time period is reached, Kaspersky MLAD automatically terminates the inactive user session. The default value of this parameter is
1440. - If you need to prevent users from ignoring the password change recommendation when they connect to the application web interface for the first time, turn on the Require password change on first login toggle switch.
This switch is disabled by default.
- In the Number of authentication attempts field, specify the number of unsuccessful authorization attempts. When this number is reached, Kaspersky MLAD temporarily blocks the corresponding user account.
- In the Password policy settings block, do the following:
- In the Number of user passwords stored in history field, specify the number of most recent user passwords that are stored in the application.
You can specify a value starting with
1. The default value of this parameter is5.When the user password is changed, the new password must not match any passwords stored in Kaspersky MLAD. The application stores passwords in encrypted form.
- In the Password expiration period (days) field, specify the number of days during which the user can use their current password to connect to the application without changing it.
The default value of this parameter is
180. - In the Minimum password length field, specify the minimum number of characters for user passwords.
You can specify a value in the range of
8to128. The default value of this parameter is8. - If your security policy stipulates that user passwords must contain uppercase letters of the English alphabet, turn on the Require to use uppercase letters of the English alphabet (A-Z) toggle switch.
This switch is enabled by default.
- If your security policy stipulates that user passwords must contain lowercase letters of the English alphabet, turn on the Require to use lowercase letters of the English alphabet (a-z) toggle switch.
This switch is enabled by default.
- If your security policy stipulates that user passwords must contain numerals, turn on the Require to use numerals (0-9) toggle switch.
This switch is enabled by default.
- If your security policy stipulates that user passwords must contain special characters, turn on the Require to use special characters (_!@#$%^&*) toggle switch.
This switch is enabled by default.
- In the Number of user passwords stored in history field, specify the number of most recent user passwords that are stored in the application.
- In the Retention settings for information security event logs block, do the following:
- In the Volume of information security event logs (MB) field, specify the volume limit (in megabytes) for storing information security event logs in the database.
If the field is blank, Kaspersky MLAD stores all information security event logs for the time period specified in the Retention time for information security event logs (days) setting. This setting has no value by default.
If the specified volume of information security event logs in the database is exceeded, Kaspersky MLAD deletes the oldest entries.
- In the Retention time for information security event logs (days) field, specify the number of days to store information security event logs in the database.
The default value of this parameter is
100.
- In the Volume of information security event logs (MB) field, specify the volume limit (in megabytes) for storing information security event logs in the database.
- Click the Save button.
Configuring the Anomaly Detector service
You can configure the procedure for detecting anomalies based on the specific features of your monitored asset by enabling or disabling specific anomaly detection in the Anomaly Detector service settings.
System administrators can configure the Anomaly Detector service.
To configure the settings of the Anomaly Detector service:
- In the lower-left corner of the window, click .
You will be taken to the administrator menu.
- Select System parameters → Anomaly Detector.
A list of options appears on the right.
- Enable or disable the Limit Detector using the Use Limit Detector toggle switch.
Limit Detector logs incidents when the upper or lower blocking thresholds set for the tag are exceeded.
- Use the Use Forecaster detector toggle switch to enable or disable anomaly detection with ML model predictive elements.
ML model predictive elements register incidents when detecting discrepancies between observed and predicted tag values.
- Enable or disable the XGBoost detector using the Use XGBoost detector toggle switch.
- Use the Use Rule Detector toggle switch to enable or disable anomaly detection with ML model elements based on diagnostic rules.
Diagnostic rules register incidents when the output of a diagnostic rule exceeds a predetermined limit.
- Enable or disable the function for skipping gaps in the incoming data stream using the Skip gaps in data toggle switch.
If the toggle switch is on, during ML model inference, its components do not generate any artifacts when no data is received for the ML model element tags for a period longer than the UTG period as specified in Grid step (sec) for that element.
- In the Maximum number of records requested from the Message Broker service field, enter the number of records that must be requested from the Message Broker service for subsequent processing in the Anomaly Detector.
The higher the value, the less frequently Anomaly Detector requests records from Message Broker. The value depends on the amount of telemetry data received by Kaspersky MLAD in real time.
- In the Number of messages sent in one block to the Message Broker service field, enter the number of incidents that must be sent to the Message Broker service at one time.
- Click the Save button.
Configuring the Keeper service
Kaspersky MLAD uses the Keeper service to route telemetry data that should be saved in the database. You can configure the settings that define the rate of incoming data received from connectors and external sources, and the volume of data to be saved in the Kaspersky MLAD database.
System administrators can configure the data routing settings in Kaspersky MLAD.
To configure the Keeper service:
- In the lower-left corner of the window, click .
You will be taken to the administrator menu.
- Select the System parameters → Keeper section.
A list of options appears on the right.
- Perform one of the following actions:
- To save both known and unknown tags values from external sources to the database, turn on the Save values of all tags toggle.
- To save only the tags values that are known to the application, turn off the Save values of all tags toggle.
- In the Timeout for receiving tag values (ms) field, enter the maximum timeout (in milliseconds) for receiving the values of tags.
The higher the value, the less frequently Keeper receives tag values and writes these to the database. We recommend setting a value that matches the frequency of receiving telemetry data from the monitored asset.
- In the Timeout for receiving incidents (ms) field, enter the maximum timeout in milliseconds for receiving incidents.
The higher the value, the less frequently Keeper receives incident data and writes these to the database. We recommend setting a value that matches the incident frequency.
- In the Timeout for receiving metrics (ms) field, enter the maximum timeout in milliseconds for receiving metrics.
The higher the specified value, the less often Keeper receives metrics (the number of received observations for tags, the number of events, and the number of generated artifacts) and writes these to the database. We recommend setting a value that matches the frequency of receiving metrics from CEF Connector.
- Click the Save button.
Configuring the Mail Notifier service
Kaspersky MLAD uses the Mail Notifier service to notify users when incidents are registered by the application.
System administrators can configure the Mail Notifier service.
Setting up Mail Notifier is optional and only required for receiving email notifications about new registered incidents. First, you need to configure an SMTP server on the network where the monitored object is located.
To configure the Mail Notifier service:
- In the lower-left corner of the window, click .
You will be taken to the administrator menu.
- Select System parameters → Mail Notifier.
A list of options appears on the right.
- In the Notification sender email field, specify the email address that will send incident notifications.
- In the SMTP server address field, enter the IP address of the SMTP server.
- In the SMTP server port field, enter the port of the SMTP server.
- In the SMTP server user name field, enter the user name for connecting to the SMTP server.
- In the SMTP server password field, enter the password for connecting to the SMTP server.
- Use the Use TLS connection toggle switch to enable or disable secure TLS connection.
By default, use of a secure TLS connection is disabled.
To avoid compromising the sent data, it is recommended to enable the use of a secure TLS connection. It is recommended to use a secure TLS connection via the TLS-1.2 or TLS-1.3 protocol using a cipher suite from the list of recommended ciphers.
- If you are using a secure TLS connection, do the following:
- Upload the SMTP server certificate using the Browse button under SMTP server certificate.
- Upload the key to the SMTP server certificate file using the Browse button under the Key to SMTP server certificate setting.
It is recommended to use a certificate with a certificate key length of 4096 bits when using the RSA algorithm, or 256 bits when using the ECDH algorithm.
Certificates and certificate keys can be uploaded only as files in DER or PEM format.To delete the certificate file or certificate key, click the
button in the corresponding field. To save the certificate file or certificate key on your computer, click the  button in the corresponding field.
 - Click the Save button.
Configuring the Similar Anomaly service
Kaspersky MLAD uses the Similar Anomaly service to identify similar incidents and combine them into groups. In groups, you can view similar incidents that were registered at different times.
System administrators can configure the Similar Anomaly service.
To configure the Similar Anomaly service:
- In the lower-left corner of the window, click .
You will be taken to the administrator menu.
- Select System parameters → Similar Anomaly.
A list of service settings appears on the right.
- In the Minimum number of incidents in group field, enter the minimum number of similar incidents for forming a group.
- In the Maximum number of incidents in group field, enter the maximum number of incidents that can be put into one group.
The larger the specified value, the more incidents the application can assign to one group.
- In the Maximum distance between similar incidents field, enter the maximum distance that similar incidents can lag behind each other.
You can specify a value in the range of
0to1. - Click the Save button.
Configuring the Stream Processor service
The Stream Processor service gathers real-time telemetry data (input stream) received from the monitored asset at arbitrary points in time and converts this data to a UTG (output stream). Based on the accumulated data, the Stream Processor service determines the values of tags in the output data stream. After converting data into an output stream, the Stream Processor service forwards this data to the ML model for processing.
When converting incoming telemetry data, the Stream Processor service accounts for potential data losses (for example, if the network of the monitored asset temporarily goes down) and processes observations that were received in Kaspersky MLAD too early or too late. In these cases, the Stream Processor service generates default incidents and/or forwards default tag values to the output data stream.
The Stream Processor service can also compute derivative tags based on incoming telemetry data (for example, to calculate the moving average or average value of a group of tags).
The Stream Processor service configuration file for uploading is provided by Kaspersky specialists or a certified integrator.
System administrators can configure the Stream Processor service.
To configure the Stream Processor service:
- In the lower-left corner of the window, click .
You will be taken to the administrator menu.
- Select System parameters → Stream Processor.
- In the Uniform temporal grid period (sec) field, specify the period (in seconds) for which the Stream Processor service will process incoming telemetry data.
- Using the Browse button under the Configuration file setting, add a file that contains configuration settings for the Stream Processor service.
If you need to delete the configuration file for the Stream Processor service, click the
button. To save the configuration file on your computer, click the button. - Click the Save button.
Configuring the HTTP Connector
Kaspersky MLAD uses the HTTP Connector to receive data from CSV files by uploading data using the POST method. You can download data over port 4999 via HTTP or HTTPS by specifying the relevant protocol in a request.
In Kaspersky MLAD, certificate files and key files can be uploaded only in DER or PEM format. If necessary, you can use the OpenSSL utility to change the format of certificate files and the certificate key. Thus, to change the format of a certificate file from P12 to PEM, run the following command in the console:
openssl pkcs12 -in <certificate name>.p12 -clcerts -nokeys -out <certificate name>.pem
System administrators can configure the HTTP Connector.
To configure the HTTP Connector:
- In the lower-left corner of the window, click .
You will be taken to the administrator menu.
- Select System parameters → HTTP Connector.
A list of options appears on the right.
- In the Size of written block (tag count) field, specify the number of tags values that are written to the Message Broker service at one time.
The specified value affects the number of iterations for writing tag values from the CSV file to Message Broker according to the total number of observations for tags retrieved via HTTP Connector.
- In the Maximum size of uploaded file (MB) field, specify the maximum size in megabytes of a file transmitted to the HTTP Connector.
If you try to download a larger CSV file, the file would not be passed to the HTTP Connector.
- Use the Use TLS connection toggle switch to enable or disable secure TLS connection.
By default, use of a secure TLS connection is enabled.
To avoid compromising the received and/or sent data, it is recommended to keep the use of a secure TLS connection enabled.
- If you are using a secure TLS connection, use the Use the recommended TLS connection settings toggle switch to enable or disable use of the recommended TLS connection settings.
By default, use of the recommended TLS connection settings is enabled.
When the toggle switch is on, a secure TLS connection is used via the TLS-1.2 or TLS-1.3 protocol with a cipher suite from the list of recommended ciphers.
- If you are using a secure TLS connection, do the following:
- Add the HTTPS server certificate and the certificate key by using the Browse button under the HTTPS server certificate and Private key to HTTPS server certificate settings.
It is recommended to use a certificate with a certificate key length of 4096 bits when using the RSA algorithm, or 256 bits when using the ECDH algorithm.
- If you are using client certificates, add the root certificate to verify the signature of the client certificate by using the Browse button under the CA certificate for verifying the client certificate signature setting.
Certificates and certificate keys can be uploaded only as files in DER or PEM format.
To delete the certificate file or certificate key, click the
button in the corresponding field. To save the certificate file or certificate key on your computer, click the button in the corresponding field. - Add the HTTPS server certificate and the certificate key by using the Browse button under the HTTPS server certificate and Private key to HTTPS server certificate settings.
- Toggle Scale obtained tag values switch to enable or disable the conversion of tag values according to the Bias and Multiplier settings that were set when creating the tag.
Conversion of received tag values is disabled by default.
- Click the Save button.
Kaspersky MLAD will receive data from CSV files using the HTTP Connector.
The following is an example of sending a CSV file to the HTTP Connector via cURL over HTTP using the POST method to port 4999 of the Kaspersky MLAD server:
curl -F "file=@<file name>.csv" -X POST "http://<Kaspersky MLAD server IP address or domain name>:4999/upload" |
The HTTP Connector accepts CSV files with the following fields:
timestamp;tag_name;value
where:
timestampis the time stamp in the format %Y-%m-%dT%H:%M:%S.tag_nameis the name of the tag.valueis the tag value.If a tag value contains a fractional portion, use a dot to separate the integer from the fractional portion.
Configuring the MQTT Connector
Kaspersky MLAD uses the MQTT Connector to receive data and send messages about incident registration via the MQTT (Message Queuing Telemetry Transport) protocol.
System administrators can configure the MQTT Connector.
To configure the MQTT Connector:
- In the lower-left corner of the window, click .
You will be taken to the administrator menu.
- Select System parameters → MQTT Connector.
A list of options appears on the right.
- Use the Use TLS connection toggle switch to enable or disable secure TLS connection.
By default, use of a secure TLS connection is enabled.
To avoid compromising the received and/or sent data, you are advised to keep the use of a secure TLS connection enabled.
- If you are using a secure TLS connection, use the Use the recommended TLS connection settings toggle switch to enable or disable use of the recommended TLS connection settings.
By default, use of the recommended TLS connection settings is enabled.
When the toggle switch is on, a secure TLS connection is used via the TLS-1.2 or TLS-1.3 protocol with a cipher suite from the list of recommended ciphers.
- In the MQTT broker (address:port) field, specify the host name and port of the external MQTT broker that the MQTT Connector will interact with.
The default value of this parameter is
mqtt_broker:1883. - In the User name for MQTT connection field, enter the user name to connect to the MQTT broker.
- In Password for MQTT connection, enter the user password for connecting to the MQTT broker.
- If you are using a secure TLS connection and a self-signed certificate is installed on the MQTT broker, add the root certificate for the MQTT broker by using the Browse button under the CA certificate setting.
To delete the certificate file, click the
button. To save the certificate file on your computer, click the button. - If you are using a secure TLS connection and client authentication is enabled on the MQTT broker, do the following:
- Add the client certificate by using the Browse button under the Client certificate setting.
- Add the key for the client certificate by using the Browse button under the Key to client certificate setting.
It is recommended to use a certificate with a certificate key length of 4096 bits when using the RSA algorithm, or 256 bits when using the ECDH algorithm.
Certificates and certificate keys can be uploaded only as files in DER or PEM format.To delete the certificate file or certificate key, click the
button in the corresponding field. To save the certificate file or certificate key on your computer, click the button in the corresponding field. - In the List of MQTT subscriptions for receiving tags field, enter the name of the list of MQTT subscriptions from which the MQTT Connector will receive tag values.
The default value of this parameter is
tags. - In the MQTT topic for publishing messages field, specify the name of the topic where the MQTT Connector will publish messages about incident registration.
If no value is defined for this setting, messages are not sent.
This setting has no value by default.
- In the Data format drop-down list, select the format to receive data from external systems and send messages about incidents.
The following options are available:
JSONBatch,Topic,SmartHome,KISG.The default value of this parameter is
JSONBatch.If you are having difficulty selecting a data format, consult Kaspersky or a certified integrator.
If none of the incident data and message formats suits you, you can contact Kaspersky Lab experts to add the required format.
- If you have selected the
Topicdata format, add a configuration file containing the connector settings for this data format using the Browse button under the Connector configuration file setting.To delete the certificate file, click the
button. To save the certificate file on your computer, click the button. - Toggle Scale obtained tag values switch to enable or disable the conversion of tag values according to the Bias and Multiplier settings that were set when creating the tag.
Conversion of received tag values is disabled by default.
- Click the Save button.
Kaspersky MLAD will receive data and send messages about incident registration via the MQTT protocol.
Page topConfiguring the AMQP Connector
Kaspersky MLAD uses the AMQP Connector to receive data and send messages about incident registration via AMQP (Advanced Message Queuing Protocol).
System administrators can configure the AMQP Connector.
To configure the AMQP Connector:
- In the lower-left corner of the window, click .
You will be taken to the administrator menu.
- Select System parameters → AMQP Connector.
A list of options appears on the right.
- Use the Use TLS connection toggle switch to enable or disable secure TLS connection.
By default, use of a secure TLS connection is enabled.
To avoid compromising the received and/or sent data, you are advised to keep the use of a secure TLS connection enabled.
- If you are using a secure TLS connection, use the Use the recommended TLS connection settings toggle switch to enable or disable use of the recommended TLS connection settings.
By default, use of the recommended TLS connection settings is enabled.
When the toggle switch is on, a secure TLS connection is used via the TLS-1.2 or TLS-1.3 protocol with a cipher suite from the list of recommended ciphers.
- In the AMQP broker (address:port) field, specify the host name and port of the external AMQP broker that the AMQP Connector will interact with.
The default value of this parameter is
rabbitmq:5672. - In the User name for AMQP connection field, enter the user name to connect to the AMQP broker.
- In Password for AMQP connection, enter the user password for connecting to the AMQP broker.
- If you are using a secure TLS connection and a self-signed certificate is installed on the AMQP broker, add the root certificate for the AMQP broker by using the Browse button under the CA certificate setting.
A certificate can be downloaded as a DER or PEM file only.
To delete the certificate file, click the
button. To save the certificate file on your computer, click the button. - If you are using a secure TLS connection and client authentication is enabled on the AMQP broker, do the following:
- Add the client certificate by using the Browse button under the Client certificate setting.
- Add the key for the client certificate by using the Browse button under the Key to client certificate setting.
It is recommended to use a certificate with a certificate key length of 4096 bits when using the RSA algorithm, or 256 bits when using the ECDH algorithm.
A certificate and certificate key can be uploaded only as a file in DER or PEM format.To delete the certificate file or certificate key, click the
button in the corresponding field. To save the certificate file or certificate key on your computer, click the button in the corresponding field. - In the AMQP virtual host field, specify the virtual host for establishing a connection between the AMQP Connector and the external AMQP broker.
The default value of this parameter is
/. - In the AMQP exchange point name for receiving tag values field, specify the name of the exchange point to receive tags values from an external AMQP broker.
If a value is not defined for this parameter, tags values will not be received via the AMQP Connector.
This setting has no value by default.
- In the List of AMQP subscriptions for receiving tag values field, specify the name of the list of subscriptions from which the AMQP Connector will receive tag values.
The default value of this parameter is
#. - In the AMQP queue for receiving tag values field, specify the name of the queue for the AMQP connector.
- In the AMQP exchange point name for publishing messages field, specify the name of the exchange point for sending incident registration messages.
If no value is defined for this parameter, messages will not be sent. You can specify the same name that you indicated in step 10 of these instructions.
This setting has no value by default.
- In the AMQP topic for publishing messages field, specify the name of the topic where the AMQP Connector will publish messages about incident registration.
The default value of this parameter is
alert. - In the Data format drop-down list, select the format to receive data from external systems and send messages about incidents.
The following options are available:
JSONBatch,Topic,SmartHome,KISG.The default value of this parameter is
JSONBatch.If you are having difficulty selecting a data format, consult Kaspersky or a certified integrator.
If none of the incident data and message formats suits you, you can contact Kaspersky Lab experts to add the required format.
- If you have selected the
Topicdata format, add a configuration file containing the connector settings for this data format using the Browse button under the Connector configuration file setting.To delete the connector configuration file, click the
button. To save the connector configuration file on your computer, click the button. - Toggle Scale obtained tag values switch to enable or disable the conversion of tag values according to the Bias and Multiplier settings that were set when creating the tag.
Conversion of received tag values is disabled by default.
- Click the Save button.
Kaspersky MLAD will receive data and send messages about incident registration via the AMQP protocol.
Page topConfiguring the OPC UA Connector
Kaspersky MLAD uses the OPC UA Connector to receive data over a protocol described by the OPC Unified Architecture specification.
System administrators can configure the OPC UA Connector.
To configure the OPC UA Connector:
- In the lower-left corner of the window, click .
You will be taken to the administrator menu.
- Select System parameters → OPC UA Connector.
A list of options appears on the right.
- In the Connection point field, specify the connection address.
For example:
opc.tcp://10.0.0.0:8001/freeopcua/server/. - In the OPC UA server connection timeout (sec) field, specify the time period (in seconds) that the OPC UA Connector will attempt to establish a connection with the OPC UA server.
- Using the Browse button under the Configuration file setting, add a file containing settings for the OPC UA Connector.
To delete the connector configuration file, click the
button. To save the connector configuration file on your computer, click the button. - Toggle Scale obtained tag values switch to enable or disable the conversion of tag values according to the Bias and Multiplier settings that were set when creating the tag.
Conversion of received tag values is disabled by default.
- Select a message encryption algorithm from the Connection security policy drop-down list.
The following options can be selected: None, Basic256, Basic128Rsa15, Basic256Sha256, Aes128Sha256RsaOaep.
- In the Secure messaging mode drop-down list, select one of the following values:
- If you do not want to sign or encrypt messages, select None.
- If you want to sign messages, select Sign messages.
- If you want to sign and encrypt messages, select Sign and encrypt messages.
- In User name, enter the user name for connecting to the OPC UA server.
- In Password, enter the password for connecting to the OPC UA server.
- If it is necessary to use a secure connection and client authentication is enabled on the OPC UA server, do the following:
- Add the client application certificate by using the Browse button under the Client certificate setting.
- Add the private key to the client application certificate by using the Browse button under the Client private key setting.
- In Client private key password, specify the password to use for unlocking the private key.
It is recommended to use a certificate with a certificate key length of 4096 bits when using the RSA algorithm, or 256 bits when using the ECDH algorithm.
A certificate and certificate key can be uploaded only as a file in DER or PEM format.To delete the certificate file or certificate key, click the
button in the corresponding field. To save the certificate file or certificate key on your computer, click the button in the corresponding field. - If it is necessary to use a secure connection and a self-signed certificate is installed on the OPC UA server, add the root certificate for the OPC UA server using the Browse button under the OPC UA server CA certificate setting.
To delete the certificate file, click the
button. To save the certificate file on your computer, click the button. - In the Historical data interval (sec) field, specify the time interval (in seconds) for which the OPC UA Connector requests historical data stored on the OPC UA server.
Enter
0if you do not need to download historical data. Enter-1if you need to download all historical data.If Start of the historical data period and End of the historical data period are set, historical data is loaded for the specified period.
- In the Start of the historical data period field, select the start date and time of the period for which you want to download data from the OPC UA server.
- In the End of the historical data period field, select the end date and time of the period for which you want to download data from the OPC UA server.
- In the Size of historical data block sent by OPC UA server (numvalues parameter) field, specify the number of tags values that will be transmitted in the historical data block sent to the OPC UA Connector from the OPC UA server.
The specified value affects the number of iterations for sending historical data to OPC UA Connector according to the total number of observations for tags received from the OPC UA server.
- In the Size of historical data block sent to Message Broker service field, specify the number of tags that will be transmitted in the historical data block sent from the OPC UA Connector to the Message Broker service.
The specified value affects the number of iterations for sending historical data to Message Broker according to the total number of observations for tags recieved via OPC UA Connector.
- Click the Save button.
Configuring the KICS Connector
Kaspersky MLAD uses the KICS Connector to receive data from Kaspersky Industrial CyberSecurity for Networks 4.0 and later and to send back incident registration messages.
The connector for integration with Kaspersky MLAD must be created and added to Kaspersky Industrial CyberSecurity for Networks in advance. For detailed information about creating and adding a connector, please refer to the Adding a connector section of Kaspersky Industrial CyberSecurity for Networks Help Guide.
System administrators can perform integration with Kaspersky Industrial CyberSecurity for Networks version 4.0 or higher.
To configure the KICS Connector:
- In the lower-left corner of the window, click .
You will be taken to the administrator menu.
- Select System parameters → KICS Connector.
A list of options appears on the right.
- Using the Browse button under the setting Communication data package for KICS Connector (zip) field, add the file containing the settings for configuring interaction between Kaspersky MLAD and Kaspersky Industrial CyberSecurity for Networks.
For detailed information about creating a communication data package, please refer to the Kaspersky Industrial CyberSecurity for Networks Help Guide. The created communication data package must be saved on the computer where Kaspersky MLAD is installed.
If you need to delete a communication data package, click the
button in the Communication data package for KICS Connector (zip) field. To save the communication data package on your computer, click the button. - In the Password for KICS Connector field, enter the password that you specified when adding the connector to Kaspersky Industrial CyberSecurity for Networks.
- Toggle Send messages to Kaspersky Industrial CyberSecurity for Networks switch to enable or disable forwarding of messages about registered incidents to Kaspersky Industrial CyberSecurity for Networks.
- In the Tag value sampling frequency (Hz) field, specify the frequency in Hz at which you need to receive tag values from Kaspersky Industrial CyberSecurity for Networks.
Indicate
is not required.0in this field if - Toggle Scale obtained tag values switch to enable or disable the conversion of tag values according to the Bias and Multiplier settings that were set when creating the tag.
Conversion of received tag values is disabled by default.
- Click the Save button.

Kaspersky MLAD receives data from Kaspersky Industrial CyberSecurity for Networks and sends back messages about incident registration.
Page topConfiguring the CEF Connector
Kaspersky MLAD uses the CEF Connector to receive data from external sources of events (such as the Industrial Internet of Things, network devices and applications) and to send incident registration messages to an external system.
You can also use the CEF Connector to send information security event logs of Kaspersky MLAD to an external system. Information security event logs are automatically written to the Kaspersky MLAD database.
To receive events from external sources using the CEF Connector, configure the Event Processor service.
Before configuring the CEF Connector settings in the Kaspersky MLAD web interface, the IP address and port number to be used for connecting the external event source to the CEF Connector must be specified in the .env file. The settings of the configuration file can be changed only by a qualified technical specialist of the Customer, a Kaspersky employee, or a certified integrator.
System administrators can configure the CEF Connector.
To configure the CEF Connector:
- In the lower-left corner of the window, click .
You will be taken to the administrator menu.
- Select System parameters → CEF Connector.
A list of options appears on the right.
- Use the Receive events for the Event Processor service toggle switch to enable or disable use of the CEF Connector for receiving events from an external system.
- Toggle Send registered incidents to SIEM system switch to enable or disable forwarding of messages about incidents registered by the application to the external system.
- Toggle Send registered events to SIEM system switch to enable or disable forwarding of messages about events registered by Event Processor service to the external system.
- In the IP address for sending events and incidents to SIEM system field, specify the IP address for connecting an external system to the CEF Connector and forwarding events processed by the Event Processor service and incidents.
- In the Port for sending events and incidents to SIEM system field, specify the port number for connecting an external system to the CEF Connector and forwarding events processed by the Event Processor service and incidents.
- If you need to send information security event logs of Kaspersky MLAD to an external system, turn on the Send information security event logs to a Syslog server toggle switch and do the following:
- In the Transport protocol for sending information security events to a Syslog server drop-down list, select the protocol that you want to use for sending information security event logs.
Kaspersky MLAD supports the TCP and UDP protocols for sending information security event logs to an external system.
- In the Syslog server address for sending information security events field, specify the IP address or host name of the external system to which the information security event logs must be sent.
- In the Syslog server port for sending information security events field, specify the port number of the external system to which the information security event logs must be sent.
- In the Transport protocol for sending information security events to a Syslog server drop-down list, select the protocol that you want to use for sending information security event logs.
- Use the Use TLS connection toggle switch to enable or disable the use of a secure TLS connection when using Kaspersky MLAD as a client.
By default, use of a secure TLS connection is enabled.
To avoid compromising the received and/or sent data, it is recommended to keep the use of a secure TLS connection enabled.
- If you have enabled the use of a secure TLS connection, use the Use the recommended TLS connection settings toggle switch to enable or disable use of the recommended TLS connection settings.
When the toggle switch is on, a secure TLS connection is used via the TLS-1.2 or TLS-1.3 protocol with a cipher suite from the list of recommended ciphers.
- If you need to use a secure TLS connection for the server side of the CEF Connector, do the following:
- Add the server certificate and the certificate key by using the Browse button under the Server certificate and Private key to the server certificate settings.
It is recommended to use a certificate with a certificate key length of at least 4096 bits when using the RSA algorithm, or 256 bits when using the ECDH algorithm.
- If you are using client certificates, add the root certificate to verify the signature of the client certificate by using the Browse button under the CA certificate for verifying the client certificate signature setting.
Certificates and certificate keys can be uploaded only as files in DER or PEM format.
To delete the certificate file or certificate key, click the
button in the corresponding field. To save the certificate file or certificate key on your computer, click the button in the corresponding field. - Add the server certificate and the certificate key by using the Browse button under the Server certificate and Private key to the server certificate settings.
- If you need to use a secure TLS connection for the server side of the CEF Connector, do the following (if necessary):
- Add the client certificate and the certificate key by using the Browse button under the Client certificate and Private key to the client certificate settings.
It is recommended to use a certificate with a certificate key length of at least 4096 bits when using the RSA algorithm, or 256 bits when using the ECDH algorithm.
- If you are using server certificates, add the root certificate to verify the signature of the server certificate by using the Browse button under the CA certificate for verifying the server certificate signature setting.
Certificates and certificate keys can be uploaded only as files in DER or PEM format.
To delete the certificate file or certificate key, click the
button in the corresponding field. To save the certificate file or certificate key on your computer, click the button in the corresponding field. - Add the client certificate and the certificate key by using the Browse button under the Client certificate and Private key to the client certificate settings.
- Click the Save button.
Configuring the WebSocket Connector
Kaspersky MLAD uses the WebSocket Connector to receive data and send messages about incident registration via the WebSocket protocol.
System administrators can configure the WebSocket Connector. The instructions in this section are provided for information purposes.
To configure the WebSocket Connector:
- In the lower-left corner of the window, click .
You will be taken to the administrator menu.
- Select System parameters → WebSocket Connector.
A list of options appears on the right.
- In the WebSocket server URL address field, specify the web address of the WebSocket server that the WebSocket Connector will interact with.
Enter the web address in the format:
WebSocketprotocol://address:port/. - If it is necessary to use a secure connection and a self-signed certificate is installed on the WebSocket server, add the root certificate for the WebSocket server using the Browse button under the CA certificate setting.
To delete the certificate file, click the
button. To save the certificate file on your computer, click the button. - If it is necessary to use a secure connection and client authentication is enabled on the WebSocket server, do the following:
- Add the WebSocket client application certificate by using the Browse button under the Client certificate setting.
- Add the key to the WebSocket client application certificate by using the Browse button under the Key to client certificate setting.
It is recommended to use a certificate with a certificate key length of 4096 bits when using the RSA algorithm, or 256 bits when using the ECDH algorithm.
To delete the certificate file or certificate key, click the
button in the corresponding field. To save the certificate file or certificate key on your computer, click the button in the corresponding field. - In the Data format drop-down list, select the format to receive data from external systems and send messages about incidents.
The following options are available:
JSONBatch,Topic,SmartHome,KISG.The default value of this parameter is
JSONBatch.If you are having difficulty selecting a data format, consult Kaspersky or a certified integrator.
If none of the incident data and message formats suits you, you can contact Kaspersky Lab experts to add the required format.
- If you have selected the
Topicdata format, add a configuration file containing the connector settings for this data format using the Browse button under the Connector configuration file setting.To delete the connector configuration file, click the
button. To save the connector configuration file on your computer, click the button. - Toggle Scale obtained tag values switch to enable or disable the conversion of tag values according to the Bias and Multiplier settings that were set when creating the tag.
Conversion of received tag values is disabled by default.
- Toggle Submit incidents switch to enable or disable the forwarding of messages about incidents registered in Kaspersky MLAD to a WebSocket server.
- If you are using a secure TLS connection, use the Use the recommended TLS connection settings toggle switch to enable or disable use of the recommended TLS connection settings.
By default, use of the recommended TLS connection settings is enabled.
When the toggle switch is on, a secure TLS connection is used via the TLS-1.2 or TLS-1.3 protocol with a cipher suite from the list of recommended ciphers.
- Click the Save button.
Kaspersky MLAD will receive data and send messages about incident registration via the WebSocket protocol.
Page topConfiguring the Event Processor service
Kaspersky MLAD uses the Event Processor service to identify patterns and anomalous sequences of events and patterns. You can configure the settings of the Event Processor service.
If Kaspersky MLAD is restarted, you do not need to re-configure the Event Processor service settings. Kaspersky MLAD restores the Event Processor service state from the database or file in bit format. This restoration process may take several minutes if there is a significantly large number of processed events or registered patterns. Until the state of the Event Processor service is restored in the Event Processor section, requests will not be fulfilled, data will not be updated, and data received from the CEF Connector will not be processed. This data is temporarily stored in the system message queue and is processed after the state of the Event Processor service is restored.
The Event Processor service may require a large amount of RAM on the server where Kaspersky MLAD is installed. The amount of RAM usage depends on the rate of the event stream and the volume of events history that is processed. The specific configuration of the Event Processor service also has an effect on the amount of RAM usage.
System administrators can configure the Event Processor service.
To configure the Event Processor service:
- In the lower-left corner of the window, click .
You will be taken to the administrator menu.
- Select System parameters → Event Processor.
A list of service settings appears on the right.
- In the Online mode section, do the following:
- Using the Browse button under the setting Event processor configuration file field, add the file containing the configuration settings for the Event Processor service.
The Configuration file is created by a qualified technical specialist of the Customer, a Kaspersky Lab employee or a certified integrator.
If you need to delete the configuration file for the Event Processor service, click the
button. To save the configuration file on your computer, click the button.Changing the configuration file of the Event Processor service results in a complete loss of the service's data.
- If you need to process incidents registered by the Anomaly Detector service, turn on the Process incidents as events toggle switch.
- In the Maximum number of network layers field, specify the number of layers of the semantic neural network that will be used.
The default number of network layers for event data that is based on a specific structure is ten layers. In most cases, ten layers are enough for the hierarchical presentation of data in the semantic neural network at the core of the Event Processor. To identify patterns of periodic processes that span an extended period of time, you may need to increase the value of the Maximum number of network layers parameter.
- In the Coefficient defining the permitted dispersion of the pattern duration field, specify the coefficient used to determine the permissible dispersion of intervals between elements in the same pattern.
If the actual dispersion value is less than or equal to one that is specified, the identified sequences of events will be registered as one pattern.
- In the Interval for receiving batch events (sec.) field, specify the time interval (in seconds) for which the Event Processor service forms an episode from incoming events received for processing.
If the rate of incoming events is approximately 1000 events per second, it is recommended to indicate this value as the interval for receiving new events so that you receive a number of events close to the value indicated in the Batch size in online mode (number of events) field during the specified period. If the rate of incoming events is a lot lower than this value, you should adjust the interval for receiving new events to ensure an optimal frequency of event processing.
- In the Batch size in online mode (number of events) field, specify the maximum number of events per episode to be subsequently processed by the Event Processor service.
If the rate of incoming events is approximately 1000 events per second, it is recommended to indicate a value equal to
4096in this field. - In the Method of saving the state of the Event Processor service drop-down list, select one of the following options for saving the Event Processor service state:
- Database table – Kaspersky MLAD saves the results from processing each episode in the database table.
- File in bit format – Kaspersky MLAD saves the state of the Event Processor service according to the frequency defined in the Component backup frequency field. The application saves the state of the service to the file specified in the File containing a backup copy of the component state field.
Saving the Event Processor service state to a file in bit format is recommended for debugging and configuring the application settings by Kaspersky employees during the deployment of Kaspersky MLAD.
By default, the Event Processor service saves the results of event stream processing in a database table.
Changing the way of saving the Event Processor service state results in a complete loss of the service's data.
- If you select to store the Event Processor service state in a file in bit format, in the Component backup frequency field, specify how often (in days, hours, and minutes) to perform a backup of the Event Processor service.
- If you chose to store the status of the Event Processor service as a bitmap file, add the file that contains a backup copy of the Event Processor service via the Browse button under the File containing a backup copy of the component state setting.
This file will be used if you ever need to restore the state of the Event Processor service. The state of the Event Processor service can be restored by Kaspersky experts as part of their extended technical support.
If you need to delete the file containing the backup copy of the Event Processor service, click the
button. To save the file containing a backup copy of the service on your computer, click the button.
- Using the Browse button under the setting Event processor configuration file field, add the file containing the configuration settings for the Event Processor service.
- In the Sleep mode section, do the following:
- In the Batch size in sleep mode (number of events) field, specify the number of events for forming an episode in sleep mode.
The Event Processor service generates episodes based on the history of events received for reprocessing during the time interval specified in the Events history interval for processing in sleep mode field.
- In the Send alerts when the monitor is activated in sleep mode field, select one of the following values:
- Send alerts when the monitor is activated by any pattern – Kaspersky MLAD sends alerts when the monitor is activated in the sleep mode if the patterns are detected in accordance with the specified monitoring criteria. The number of monitor activations is refreshed in the Event Processor section on the Monitoring tab.
- Do not send alerts when the monitor is activated – Kaspersky MLAD does not send alerts when the monitor is activated in the sleep mode.
- Send alerts when the monitor is activated by a new pattern – Kaspersky MLAD sends alerts when the monitor is activated in the sleep mode if new patterns are detected in accordance with the specified monitoring criteria. The number of monitor activations is refreshed in the Event Processor section on the Monitoring tab.
- Send alerts when the monitor is activated by a previously registered pattern – Kaspersky MLAD sends alerts when the monitor is activated in the sleep mode if stable patterns are detected in accordance with the specified monitoring criteria. The number of monitor activations is refreshed in the Event Processor section on the Monitoring tab.
- In the Sleep mode frequency field, specify how often (in days) and at what time (according to the UTC standard) the Event Processor service goes to the sleep mode to reprocess events.
It is recommended to specify the time when the event stream is the least intensive as the start time for the sleep mode.
If the specified sleep time has not yet come on the current day, the Event Processor will go to the sleep mode on that day. If the sleep time has already been missed on the current day, the Event Processor will go to the sleep mode at the specified time after the specified number of days.
- In the Sleep mode duration (HH:MM) field, specify the time period (in hours and minutes) during which the Event Processor service processes events in the sleep mode.
- In the Events history interval for processing in sleep mode field, specify the time interval (in days, hours, and minutes) during which the analyzed events must be forwarded for reprocessing in the sleep mode to the Event Processor service.
- In the Batch size in sleep mode (number of events) field, specify the number of events for forming an episode in sleep mode.
- Click the Save button.
Configuring the statuses and causes of incidents
Kaspersky MLAD lets you specify the causes of incidents and the statuses of incidents and groups of incidents.
The status of an incident or a group of incidents is a mark about the status of incident analysis performed by an expert. After installation of Kaspersky MLAD, the following statuses of incidents and incident groups are available by default: Under review, Decision pending, Instructions issued, Problem closed, Cause unknown, Ignore and False positive. For the Problem closed and Ignore statuses, the Notify about an incident check box is cleared by default. If during registration, incidents are automatically assigned one of these statuses, no email alerts will be sent, and no incident dot indicators will be displayed under Monitoring or History. An incident status can be assigned automatically in one of the following cases:
- If the incident was automatically assigned to a group with that status.
- If the incident is registered by an ML model element that sets that incident status by default.
The incident cause is a mark of the cause of the incident added by an expert based on the results of the incident analysis.
You can add causes and statuses for incidents. The created causes and statuses of incidents will become available for selection in the Incidents section. You can also change and delete statuses and causes of incidents.
System administrators can configure the causes and statuses of incidents.
To add an incident status:
- In the lower-left corner of the window, click .
You will be taken to the administrator menu.
- Select the System parameters → Incidents section.
- In the Statuses of incidents section, click the Create button.
The Create element pane appears on the right.
- In the Value, in Russian field, specify the name of the incident status in Russian.
- In the Value, in English field, specify the name of the incident status in English.
- In the Sort field, indicate the sequence number for which the incident status will be sorted in the Incident status drop-down list in the Incidents section.
The statuses of incidents will be sorted by their names if the sequence numbers of incident statuses coincide.
- To send incident registration notifications together with the added status and display its indicator in the prediction error subsection of the Monitoring and History sections, select the Notify about an incident check box.
If you remove the checkbox, no email alerts about incidents that receive the status automatically will be sent, and no incident dot indicators will be displayed under Monitoring or History.
- Click the Save button.
To add a cause for incidents:
- In the administrator menu, select System parameters → Incidents.
- In the Causes of incidents section, click the Create button.
The Create element pane appears on the right.
- In the Incident cause field, specify the name of the incident cause.
- In the Sort field, indicate the sequence number for which the incident cause will be sorted in the Incident cause drop-down list in the Incidents section.
The causes of incidents will be sorted by their names if the sequence numbers of incident causes coincide.
- Click the Save button.
To change the statuses or causes of incidents:
- In the administrator menu, select System parameters → Incidents.
- To change the parameters of incidents, do one of the following:
- If you need to change the statuses of incidents or groups of incidents, use the Statuses of incidents settings group to select one or more incident statuses and click the Edit button.
- If you need to change the causes of incidents, use the Causes of incidents settings group to select one or more incident causes and click the Edit button.
- Make the necessary changes.
- Click the Save button.
To remove statuses or causes of incidents:
- In the administrator menu, select System parameters → Incidents.
- To remove parameters of incidents, do one of the following:
- If you need to delete the statuses of incidents or groups of incidents, use the Statuses of incidents settings group to select one or more incident statuses and click the Delete button.
- If you need to delete the causes of incidents, use the Causes of incidents settings group to select one or more incident causes and click the Delete button.
- In the window that opens, confirm the deletion.
Kaspersky MLAD will remove information about the incident statuses and causes from the corresponding tables and will remove them from the information about incidents and incident groups in the Incidents section for which these incident causes or statuses were selected.
Page topConfiguring logging for Kaspersky MLAD services
You can configure the log level for Kaspersky MLAD services to write specific information about the state of the application and display it in the logging system (Grafana). To view how Kaspersky MLAD services are mapped to the names of Docker containers and images, see the Appendix.
System administrators can configure the logging of Kaspersky MLAD services.
To configure the log levels of Kaspersky MLAD services:
- In the lower-left corner of the window, click .
You will be taken to the administrator menu.
- Select the System parameters → Logging section.
The list of Kaspersky MLAD services will be displayed on the right.
- If necessary, use the drop-down list next to the name of the relevant service to change the log level of the service.
The following log levels are available in Kaspersky MLAD:
- Debug – log all information in the application.
- Info – log basic information about application operations.
- General – log important information about application operations.
- Warning – log errors that occur during operation of the application and log events that could lead to errors in application operations.
- Error – log errors that occur in application operations.
- Critical – log critical errors that occur in application operations.
The General log level is used for most services by default. The Info log level is used for the API Server service by default.
- Click the Save button.
Configuring time intervals for displaying data
Kaspersky MLAD lets you specify the time interval (scale) for displaying data on graphs in the Monitoring, History and Time slice sections. After installation of Kaspersky MLAD, the following time intervals are available by default:
- 1, 5, 10, 15, and 30 minutes
- 1, 3, 6, and 12 hours
- 1, 2, 15, and 30 days
- 3 and 6 months
- 1, 2, and 3 years
You can add time intervals for displaying data on graphs. The created time intervals will become available for selection in the Monitoring, History and Time slice sections. You can also edit and delete time intervals.
System administrators can configure the time intervals for displaying data on charts.
To add a time interval for displaying data:
- In the lower-left corner of the window, click .
You will be taken to the administrator menu.
- Select the System parameters → Graphs section.
- In the Time intervals settings group, click the Create button.
The Create element pane appears on the right.
- In the Time interval (sec.) field, specify the time interval for which you want to display data on graphs.
When a time interval is entered, Kaspersky MLAD automatically breaks down the time interval into specific units of time (years, months, weeks, days, hours, minutes, and seconds) in the Value, in Russian and Value, in English fields.
- If necessary, change the Russian name of the time interval in the Value, in Russian field.
- If necessary, change the English name of the time interval in the Value, in English field.
- In the Sort field, indicate the sequence number for which the time interval will be sorted in the drop-down lists in the Monitoring, History and Time slice section.
- Click the Save button.
To change the time intervals for displaying data:
- In the administrator menu, select System parameters → Graphs.
- In the Time intervals settings group, select one or more time intervals and click the Edit button.
- Make the necessary changes.
- Click the Save button.
To delete time intervals for displaying data:
- In the administrator menu, select System parameters → Graphs.
- In the Time intervals settings group, select one or more time intervals and click the Delete button.
- In the window that opens, confirm the deletion.
Information about the time intervals will be deleted from the table.
Page topConfiguring how the Kaspersky MLAD menu items are displayed
System administrators can configure settings for displaying the menu items of Kaspersky MLAD.
To configure the way Kaspersky MLAD menu items are displayed:
- In the lower-left corner of the window, click .
You will be taken to the administrator menu.
- On the opened page, in the menu on the left, select System parameters → Menu.
A list of options appears on the right.
- In the Availability of main menu items settings group, use the toggle switch to enable or disable the display of a specific section in the main menu.
- In the Availability of administrator menu items settings group, use the toggle switch to enable or disable the display of a specific section in the administrator menu.
- Click the Save button.
Export and import of Kaspersky MLAD settings
Kaspersky MLAD allows you to export and import configuration files that contain the settings of application services and connectors, as well as security settings, application service logging levels, settings for displaying the application menu and settings for typical statuses and causes of incidents, which are configured through the web interface. This could substantially reduce the time spent on configuring Kaspersky MLAD if you have to re-deploy the application.
When exporting settings, Kaspersky MLAD does not save to the archive file the passwords specified in the System parameters section, as well as the certificate files and certificate file keys uploaded in this section.
Only system administrators are allowed to export and import configuration files for Kaspersky MLAD services.
To export configuration files from Kaspersky MLAD:
- In the lower-left corner of the window, click .
You will be taken to the administrator menu.
- Select System parameters.
- Click the Export button in the upper part of the opened page.
Kaspersky MLAD configuration files will be saved in an archive named mlad-settings.tar.gz on the local computer.
To upload configuration files to Kaspersky MLAD:
- In the administrator menu, select System parameters.
- Click the Import button in the upper part of the opened page.
- In the opened window, select the archive file containing the necessary configuration of Kaspersky MLAD parameters.
Kaspersky MLAD configuration files will be uploaded to the application.
Page topManaging assets and tags
System administrators can manage assets and tags.
Assets and tags are the primary elements of the monitored asset hierarchical structure. The hierarchical structure is displayed as an asset tree.
Observations of the monitored asset are transmitted to Kaspersky MLAD as tags. Based on the obtained tag values you can perform training and inference of ML models.
In the Assets section of the administrator menu, you can view
and that have been created or uploaded to Kaspersky MLAD. Using the and
and  buttons to the left of the asset names, you can display or hide the asset tree data. You can create assets and tags, and edit tag settings, such as tag blocking thresholds.
Kaspersky MLAD uses connectors to receive telemetry data according to tags from devices of the monitored asset. Tag values, defined within the asset tree and fed into the application, along with their corresponding tag IDs, are stored in Time Series Database. When saving of all tags values is enabled, the Time Series Database service also saves IDs and values of unknown tags (not listed in the asset tree). You can compare the current asset tree structure with the structure in the Time Series Database service and add missing tags to the asset tree, if necessary.
If Kaspersky MLAD detects unknown tags received from external devices through KICS Connector, these tags will be automatically created in the KICS section of the asset tree. The application automatically assigns IDs to tags and fills in the following information received from Kaspersky Industrial CyberSecurity for Networks:
- IDs of the tags
- Names of the tags
- Descriptions of the tags
- Units of measure for the tags
- Names of the assets for which the tags are received
Kaspersky MLAD is compatible with Kaspersky Industrial CyberSecurity for Networks version 4.0 and later.
You can also delete existing tags, import tags and assets from an XLSX file, or export them to a an XLSX file.
About monitored asset hierarchical structure
Monitored asset hierarchical structure (hierarchical structure) is a way of representing the monitored asset as a tree, where the leaf nodes correspond to the tags from which telemetry data is received.
Monitored asset tags are organized as a hierarchy of assets representing, for example, units, plants, shops, and factories. The specific way assets are organized, their types and quantity are decided by the customer and depend on the structure of the asset being monitored. Each asset has only one parent element. This element can be another asset (parent asset) or a head element of the hierarchical structure (Root) that corresponds to the monitored asset as a whole.
Tags and assets are the primary elements of a hierarchical structure. You can import or export an asset tree as an XLSX file, and create and manage them in the Assets section.
In addition to primary elements, the following functional elements can be added to the hierarchical structure in the process of or as a result of the operations of Kaspersky MLAD:
Page topAbout tags
Tags are the main objects of observation in Kaspersky MLAD. A tag is a process parameter transmitted in the industrial network (temperature, for example). Measurements of physical parameters, as well as setpoints, commands, or states of control systems can be transmitted as tags. The values of tags are transmitted and received by the assets over specific protocols. The values of tags are displayed on graphs in the History and Monitoring sections and are also used to detect incidents.
Kaspersky MLAD supports several methods for obtaining telemetry data (tags). Depending on the monitored asset attributes and the tag transmission capabilities, you can select one of the following methods for receiving tag values in real time:
- Use the connectors of Kaspersky Industrial CyberSecurity for Networks that analyze mirrored traffic and send tags to Kaspersky MLAD in online mode. Kaspersky MLAD sends back information about detected incidents.
- Use the OPC UA Connector if the monitored asset provides the capability to transmit tags from ICS over the OPC UA protocol in the online mode.
- Use the MQTT Connector if the monitored asset provides the capability to transmit tags over the MQTT protocol and receive messages about incident registration in the online mode.
- Use the AMQP Connector if the monitored asset has the capability to transmit tags over the AMQP protocol and receive messages about incident registration in online mode.
- Use the WebSocket Connector if the monitored asset provides the capability to transmit tags over the WebSocket protocol and receive messages about incident registration in the online mode.
- Use the CEF Connector if the monitored asset provides the capability to transmit tags using the CEF Connector technology and receive messages about incident registration in the online mode.
- If the above methods of tag transmission are not available, you can write a tag export script for using the HTTP Connector to configure a periodic export of tags as CSV files over HTTP or HTTPS (for example, once per hour or once per minute).
You can also retrieve tag values for a specific historical period with one of the following methods:
- Using OPC UA Connector if the monitored asset supports access to historical data according to the OPC UA HDA standard
- Using HTTP Connector by uploading CSV files containing historical data
Create asset
System administrators can manage assets and tags.
In Kaspersky MLAD, you can create assets and categorize tags by asset as you see fit. For example, you can create assets to align with the production structure of the monitored asset, right down to the devices that send telemetry data.
To create a new asset:
- In the lower-left corner of the window, click .
You will be taken to the administrator menu.
- Select the Assets section.
- In the upper part of the page, click the Create button.
- In the panel that opens, in the Element type drop-down list, select the Asset value.
- If necessary, click the Choose icon button and select an icon for the asset in the opened window.
You can upload an asset icon by clicking the Load icon button. Images of any format larger than 128x128 pixels are shrunk to 128x128 while maintaining the aspect ratio. The size of the uploaded image in SVG format must not exceed 200 KB.
If you need to delete the asset icon, click the tag icon and then click Delete in the opened window.
- In the Asset drop-down list, select the section of the asset tree within which you want to create the asset.
- Specify the asset name in the Name field.
Asset names must be unique within a single asset tree section.
- Enter a description for the asset in the Description field.
- Select the type of asset from the Asset type drop-down list.
If you have uploaded the configuration of assets and tags to Kaspersky MLAD, you can select one of the asset types defined in the configuration file. Asset types are specified in the directory_types tab of the configuration file. If you have not loaded an asset and tag configuration, select System asset.
- If you have selected one of the asset types defined in the imported configuration file, specify values for the special parameters of the assets, if necessary.
The names of special parameters are specified in the directory_types tab of the configuration file.
- Click the Save button.
The asset will be created. If necessary, you can change the position of an asset in the tree.
You can also create nested assets using the asset tree. To do that, next to the name of the section to which you want to add the asset, open the vertical menu  and select Add asset.
Change asset settings
System administrators can manage assets and tags.
You can edit the settings of previously created assets.
To edit the settings of an asset in the asset tree:
- In the lower-left corner of the window, click .
You will be taken to the administrator menu.
- Select the Assets section.
- In the asset tree, next to the name of the asset whose settings you want to change, open the vertical menu and select Edit asset.
The Edit asset pane opens on the right.
- Adjust the following settings in the panel that opens, if needed:
- Asset icon
- The section of the asset tree you want to assign the asset to
The asset subsections and their tags are moved to the new asset.
- Asset name.
- Asset description
- Asset type
- Values for custom asset settings
- Click the Save button.
The asset will be modified. If necessary, you can change the position of an asset in the tree.
Page topCreate tag
System administrators can manage assets and tags.
In Kaspersky MLAD, you can create new tags to describe data received from the monitored asset (source tags) or from the Stream Processor service.
To create a new tag:
- In the lower-left corner of the window, click .
You will be taken to the administrator menu.
- Select the Assets section.
- In the upper part of the page, click the Create button.
- In the panel that opens inside the Element type drop-down list, select Tag.
- If necessary, click the Choose icon button and select an icon for the tag in the opened window.
You can upload the tag icon by clicking the Load icon button. Images of any format larger than 128x128 pixels are shrunk to 128x128 while maintaining the aspect ratio. The size of the uploaded image in SVG format must not exceed 200 KB.
If you need to delete the tag icon, click the tag icon and then click Delete in the opened window.
- In the Asset drop-down list, select the section of the asset tree to which you want to assign the created tag.
Assets in the asset tree must be preloaded or created manually.
- Specify the unique tag name in the Name field. If you want to receive tag values from an external system, specify the tag name in the external system.
- If necessary, enter a description for the tag in the Description field.
- If necessary, specify an alternative name for the tag in the Alternative name field.
- Enter the unique numerical identifier of the tag in the ID field.
You can specify a value in the range of 1 to 1,000,000.
- If necessary, in the Dimension field, specify the measurement units for the tag (for example % or mPa).
- Optionally, in the Lower and Upper fields under Blocking threshold, enter the lower and upper thresholds for acceptable tag values.
These settings are required for the Limit Detector to operate correctly. Whenever the tag value reaches its upper or lower blocking threshold, the Limit Detector registers an incident.
If Always display blocking threshold is enabled, the vertical scale of the graph will be defined by threshold lines drawn at the lower and upper boundaries of the graphic area that the tag belongs to, provided that the tag values are within the specified range. If the tag values go beyond the specified thresholds, the vertical scale will be automatically changed to display the tag values exceeding the limits.
- If necessary, in the Alarm threshold, in the Lower and Upper fields, specify the lower and upper thresholds of the tag values, upon reaching which it is necessary for the ICS to take emergency response measures.
- Optionally, enter the minimum and maximum physically possible tag values in the Lower and Upper fields under Measurement confidence thresholds. Be sure to consider any limitations of the measuring equipment.
- Optionally, in the Bias and Multiplier fields under Value conversion, enter the value to add to the tag value and the value to multiply the tag value obtained via connectors by.
The application convert the tag values according to the formula:
a * x + b, where:ais the value of the multiplier specified in Multiplier.x: the received tag valuebis the value of the offset specified in Bias.
The application performs conversion when Scale obtained tag values in the connector settings is enabled. Value conversion is possible for tags obtained with the help of MQTT Connector, AMQP Connector, OPC UA Connector, WebSocket Connector, or KICS Connector.
Value conversion is required when obtaining tag values in a unit of measurement that differs from the one specified in the Dimension field.
- If the application receives tag values via KICS Connector, optionally, in the External system asset field, specify the name of the device created in the external system that you want to receive tags for.
- If necessary, in the X, Y, and Z fields, specify the spatial coordinates for the location of the monitored asset's sensor.
You can use an arbitrary point as the origin of the coordinate system.
You can use sensor coordinates to calculate tag values when creating a preset and displaying them on the graph in the Time slice section.
- If necessary, in the Comment field, enter a brief comment for the tag.
- Click the Save button.
The new tag appears in the Tags group of the asset tree. The Tags group is created automatically and displayed as part of the selected section of the asset tree. If necessary, you can change the position of tags in the tree.
Page topAdding a tag to an asset
System administrators can manage assets and tags.
In Kaspersky MLAD, you can add tags to created assets.
To add a tag to an asset:
- In the lower-left corner of the window, click .
You will be taken to the administrator menu.
- Select the Assets section.
- In the asset tree, next to the section to which you want to add a tag, open the vertical menu and select Add tag.
The Create tag pane opens on the right.
- If necessary, click the Choose icon button and select an icon for the tag in the opened window.
You can upload the tag icon by clicking the Load icon button. Images of any format larger than 128x128 pixels are shrunk to 128x128 while maintaining the aspect ratio. The size of the uploaded image in SVG format must not exceed 200 KB.
If you need to delete the tag icon, click the tag icon and then click Delete in the opened window.
- Specify the unique tag name in the Name field. If you want to receive tag values from an external system, specify the tag name in the external system.
- If necessary, enter a description for the tag in the Description field.
- If necessary, specify an alternative name for the tag in the Alternative name field.
- Enter the unique numerical identifier of the tag in the ID field.
- If necessary, in the Dimension field, specify the measurement units for the tag (for example % or mPa).
- Optionally, in the Lower and Upper fields under Blocking threshold, enter the lower and upper thresholds for acceptable tag values.
These settings are required for the Limit Detector to operate correctly. Whenever the tag value reaches its upper or lower blocking threshold, the Limit Detector registers an incident.
If Always display blocking threshold is enabled, the vertical scale of the graph will be defined by threshold lines drawn at the lower and upper boundaries of the graphic area that the tag belongs to, provided that the tag values are within the specified range. If the tag values go beyond the specified thresholds, the vertical scale will be automatically changed to display the tag values exceeding the limits.
- If necessary, in the Alarm threshold, in the Lower and Upper fields, specify the lower and upper thresholds of the tag values, upon reaching which it is necessary for the ICS to take emergency response measures.
- Optionally, enter the minimum and maximum physically possible tag values in the Lower and Upper fields under Measurement confidence thresholds. Be sure to consider any limitations of the measuring equipment.
- Optionally, in the Bias and Multiplier fields under Value conversion, enter the value to add to the tag value and the value to multiply the tag value obtained via connectors by.
The application convert the tag values according to the formula:
a * x + b, where:ais the value of the multiplier specified in Multiplier.x: the received tag valuebis the value of the offset specified in Bias.
The application performs conversion when Scale obtained tag values in the connector settings is enabled. Value conversion is possible for tags obtained with the help of MQTT Connector, AMQP Connector, OPC UA Connector, WebSocket Connector, or KICS Connector.
Value conversion is required when obtaining tag values in a unit of measurement that differs from the one specified in the Dimension field.
- If the application receives tag values via KICS Connector, optionally, in the External system asset field, specify the name of the device created in the external system that you want to receive tags for.
- If necessary, in the X, Y, and Z fields, specify the spatial coordinates for the location of the monitored asset's sensor.
You can use an arbitrary point as the origin of the coordinate system.
You can use sensor coordinates to calculate tag values when creating a preset and displaying them on the graph in the Time slice section.
- If necessary, in the Comment field, enter a brief comment for the tag.
- Click the Save button.
The new tag appears in the Tags group of the asset tree. The Tags group is created automatically and displayed as part of the selected section of the asset tree. If necessary, you can change the position of tags in the tree.
Page topEditing a tag
System administrators can manage assets and tags.
You can edit previously created tags.
To edit a tag:
- In the lower-left corner of the window, click .
You will be taken to the administrator menu.
- Select the Assets section.
- In the asset tree, next to the name of the tag that you want to change, open the vertical menu and select Edit tag.
You can show or hide the data in the asset tree by using the
and buttons to the left of the asset names.The Edit tag pane opens on the right. In the upper part of the pane that opens, the number of ML models that use the selected tag is displayed.
- Adjust the tag settings, if needed. For a description of the settings, see the instructions on creating a tag.
Kaspersky MLAD periodically verifies information about tags received from Kaspersky Industrial CyberSecurity for Networks. If a tag name and/or information about the tag asset were changed manually, the application automatically updates the tag name and/or information about the asset according to the tag and asset names in Kaspersky Industrial CyberSecurity for Networks after the next scan.
- Click the Save button.
If necessary, you can change the position of tags in the tree.
Page topMoving assets and tags
System administrators can manage assets and tags.
You can move assets and/or tags within the asset tree. All assets and tags that are part of the selected asset will be moved.
To move an asset and/or tag:
- In the lower-left corner of the window, click .
You will be taken to the administrator menu.
- Select the Assets section.
- In the asset tree, select the check boxes next to the names of the assets and/or tags that you want to move.
- In the upper part of the page, click the Move button.
- In the panel that opens, in the Asset drop-down list, select the asset to which you want to transfer the selected assets and/or tags.
- Click the Save button.
The modified asset tree appears in the Assets section.
You can also change the location of assets and tags in the tree using the dots ( ) to the left of the name of the required asset or tag. To do this, click and hold the dots () to the left of the relevant asset or tag and drag the relevant asset or tag up or down in the tree.
Deleting an asset or tag
System administrators can manage assets and tags.
You can delete assets and/or tags from the asset tree if the selected tags or tags associated with the selected asset are not used by ML models.
Removing a tag from the application does not remove it from the monitored asset. Kaspersky MLAD will continue to receive telemetry data on the tag and, if saving of all tags values is enabled, the data will be stored in Time Series Database.
The tag must be removed from the connector configuration file before deletion.
To delete a tag:
- In the lower-left corner of the window, click .
You will be taken to the administrator menu.
- Select the Assets section.
- Perform one of the following actions:
- In the asset tree, select the check box next to the name of the tag that you want to delete and click the Delete button at the top of the page.
- In the vertical menu to the right of the relevant tag, select Delete tag.
- In the window that opens, confirm the deletion of the tag.
To delete an asset:
- In the lower-left corner of the window, click .
You will be taken to the administrator menu.
- Select the Assets section.
- Perform one of the following actions:
- In the asset tree, select the check box next to the name of the asset that you want to delete and click the Delete button at the top of the page.
- In the vertical menu to the right of the relevant asset, select Delete asset.
- In the window that opens, confirm the deletion of the asset.
To remove one or more assets and/or tags:
- In the lower-left corner of the window, click .
You will be taken to the administrator menu.
- Select the Assets section.
- In the asset tree, select the check boxes next to the names of the assets and/or tags.
If you need to remove one or more tags from an asset, expand the corresponding section of the asset tree by clicking the plus sign (
), and select the relevant tags. - Click the Delete button in the upper part of the page.
- In the window that opens, confirm the removal of assets and/or tags.
If the selected assets and/or tags are not used by ML models, the  icon is displayed in the window opposite the line Checking links between tags and added models. The selected tags will be permanently deleted from Kaspersky MLAD.
If the selected assets and/or tags are used by ML models, the  icon is displayed in the window opposite the line Checking links between tags and added models. In this case, you cannot delete the selected assets and/or tags. To delete assets and/or tags, you must delete the ML models in which they are used.
Checking the current structure of tags
System administrators can manage assets and tags.
Kaspersky MLAD receives telemetry data from monitored devices via connectors and stores tag IDs and values as defined in the asset tree, in Time Series Database. When saving of all tags values is enabled, the Time Series Database service also saves IDs and values of unknown tags (not listed in the asset tree).
Kaspersky MLAD allows you to compare the current tag structure displayed in the asset tree and used for a monitored asset to the one saved for this monitored asset in the Time Series Database service. Kaspersky MLAD detects tags that were received from external assets, but are missing in the current tag structure and are not used for the monitored asset. If necessary, you can add these tags to the current tag structure.
When receiving telemetry data on unknown tags via KICS Connector, the application also automatically creates these tags in the kics asset tree section.
To compare the current tag structure with the structure in the Time Series Database service:
- In the lower-left corner of the window, click .
You will be taken to the administrator menu.
- Select the Assets section.
- In the upper part of the page, click the Check tags button.
The current tag structure used for the monitored asset is compared with the tag structure stored in the Time Series Database service. The comparison result is displayed in the upper part of the page.
If missing tags are detected, Kaspersky MLAD displays a list of these tags with the names in the Tag <tag ID> format.
- To add missing tags, do the following:
- For each detected tag, in the Asset field select the asset to which you want to assign the tag.
- Click the Add button.
Kaspersky MLAD will add tags to the asset tree. Only the IDs, names in the Tag <tag ID> format, and the assets to which the tags are assigned are specified for these tags. If necessary, you can change the added tags.
Uploading tag and asset configuration to the system
Tag and asset configuration is created while deploying Kaspersky MLAD and building an ML model. Tag and asset configuration is provided in XLSX file format.
System administrators can manage assets and tags.
To upload tag and asset configuration to Kaspersky MLAD:
- In the lower-left corner of the window, click .
You will be taken to the administrator menu.
- Select the Assets section.
- Click the Import button.
The Hierarchical structure import pane opens on the right.
- In the File import field, add an XLSX file containing the required configuration of assets and hierarchical structure tags.
If you need to edit the asset and tag configuration file, click
 and select a new file.
 - In the Asset drop-down list, select the section of the asset tree to which you want to load the configuration of assets and tags from a file.
For configuration files with top-level assets, designate the Root of the hierarchy as the target.
- In the Import mode drop-down list, select one of the following values:
- Add and update. Kaspersky MLAD will add new assets and tags from the configuration file and update information about previously created and/or imported assets and tags within the selected section.
- Only update. Kaspersky MLAD will update information about previously created and/or imported assets and tags within the selected section.
Any new assets or tags defined in the configuration file will not be incorporated into the hierarchy.
- Overwrite. Kaspersky MLAD will delete previously created and/or imported assets and tags from the selected section and create new assets and tags from the configuration file.
- If you want all assets and tags from the configuration file to be treated as new occurrences, enable the Treat all elements as new check box.
You can use this toggle switch to upload nested assets repeated in different sections of the asset tree. To do this, load the nested asset configuration in Add and update import mode multiple times, and specify different parent assets each time you upload. However, you cannot load tags with names that match the names of previously created and/or loaded tags.
- Click the Save button.
Tag and asset configuration will be uploaded to Kaspersky MLAD. The assets and tags are displayed as an asset tree.
Page topSaving tag and asset configuration to a file
System administrators can manage assets and tags.
You can save the structure of tags and assets to a file in XLSX format for subsequent use. For instance, you can edit existing asset and/or tag settings, or introduce new ones to the hierarchy. Then, upload the revised configuration file to the application again.
To save tag and asset configuration to a XLSX file:
- In the lower-left corner of the window, click .
You will be taken to the administrator menu.
- Select the Assets section.
- Click the Export button.
The asset and tag configuration will be saved to a file named mlad_structure.xlsx (see the example in the Appendix).
Page top