How to run a scan in Kaspersky Internet Security 19 for Mac
Latest update: July 23, 2018
ID: 14573
During virus scan, Kaspersky Internet Security 19 for Mac checks your macOS and files on your Mac for viruses and threats. You can run different types of scans, which vary depending on their duration and scope.
- Full scan
- Quick scan of system memory, startup objects and system folders as well as Downloads, Documents, and Desktop folders
- Selective scan
You can:
- Run a scan from the application interface
- Run a Full or Quick scan through My Kaspersky
- Set a scan schedule so that scan tasks run automatically
- Edit the scope of scan tasks
How to run a full or quick scan from the application interface
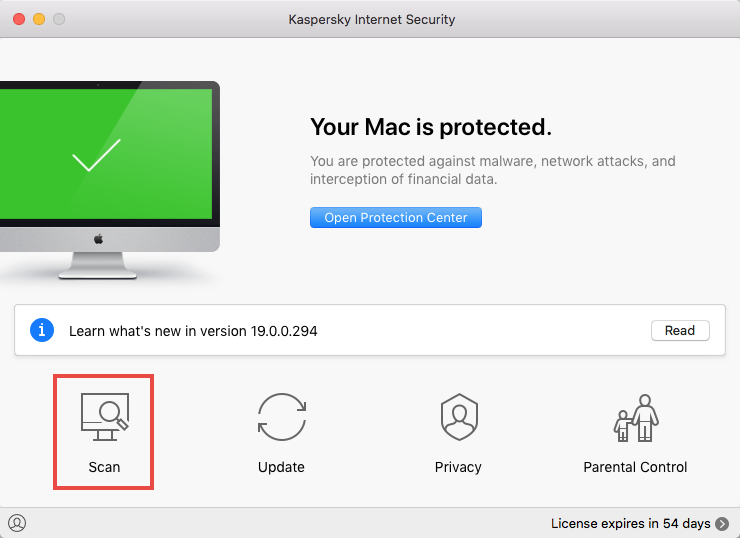
- In the main window of Kaspersky Security Cloud 19 for Mac, click Scan.
- Click Start Full Scan or Start Quick Scan.
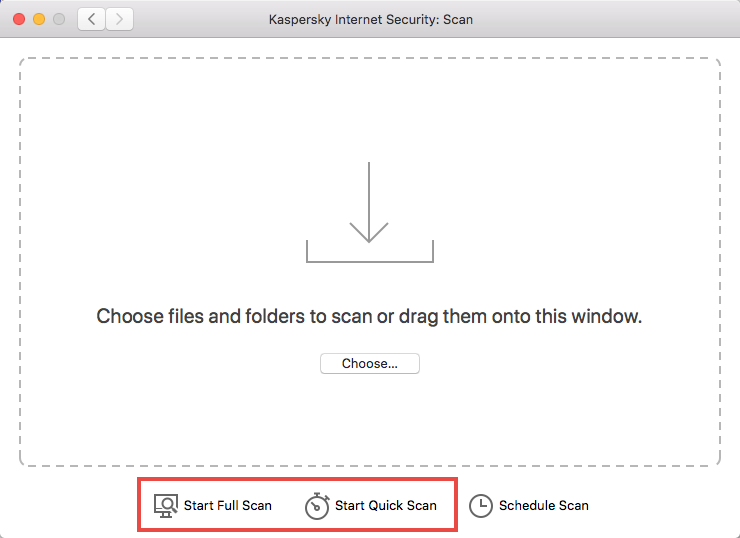
The scan has been started.
How to run a scan via My Kaspersky
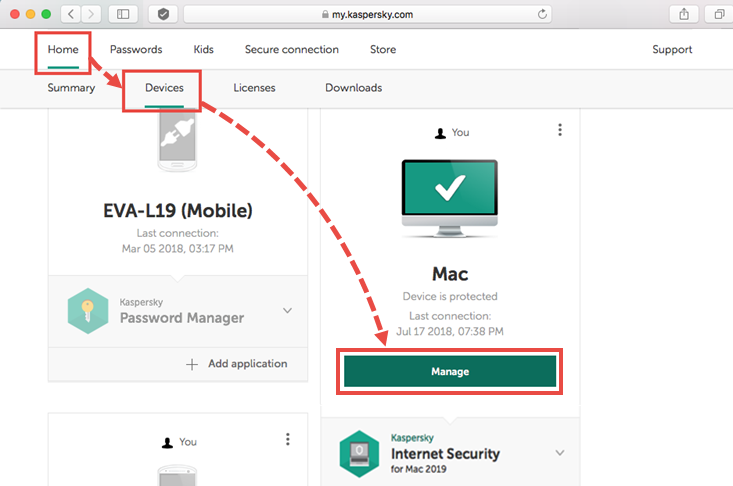
- Sign in to My Kaspersky.
- On the Main tab, select Devices, find your Mac and click Manage.
- Select Full Scan or Quick Scan.
- Click Run.
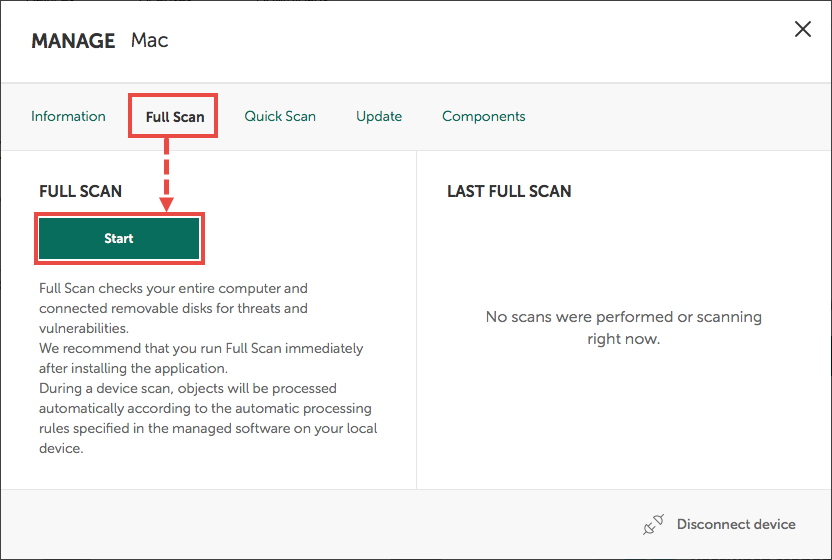
The scan has been started.
How to run a full scan from the macOS menu
Click the application icon in the upper-right corner of the screen and select Start Quick Scan in the menu.
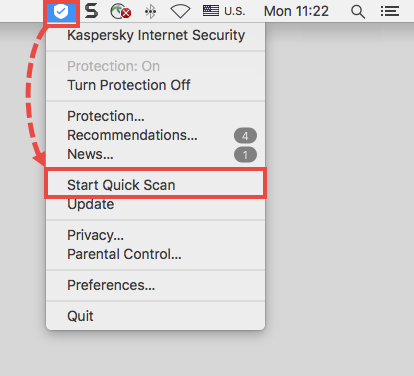
Quick Scan has been started.
How to run a selective scan
- In the main window of Kaspersky Security Cloud 19 for Mac, click Scan.
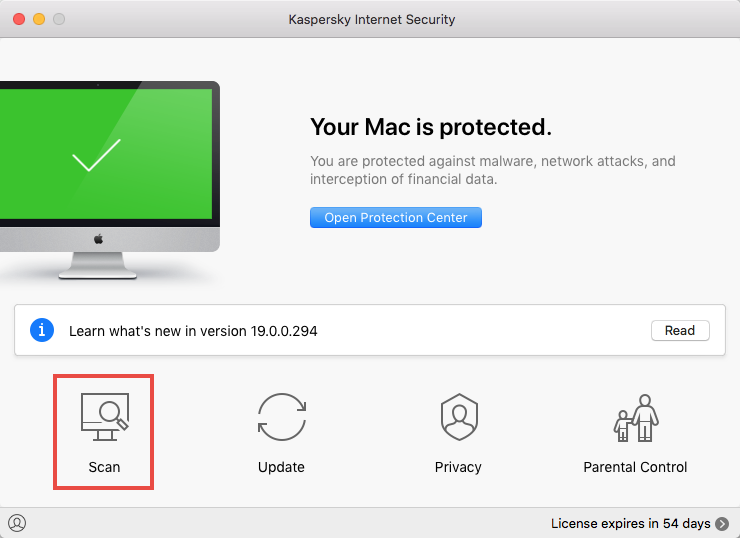
- Drag-and-drop a file to scan into the window or select the file by clicking Choose.
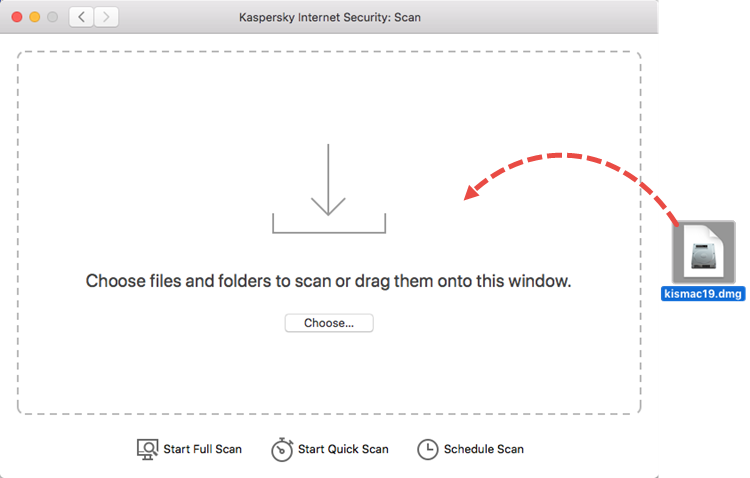
Scanning of the selected object has started.
How to set a schedule for Full or Quick Scan
- In the main window of Kaspersky Security Cloud 19 for Mac, click Scan.
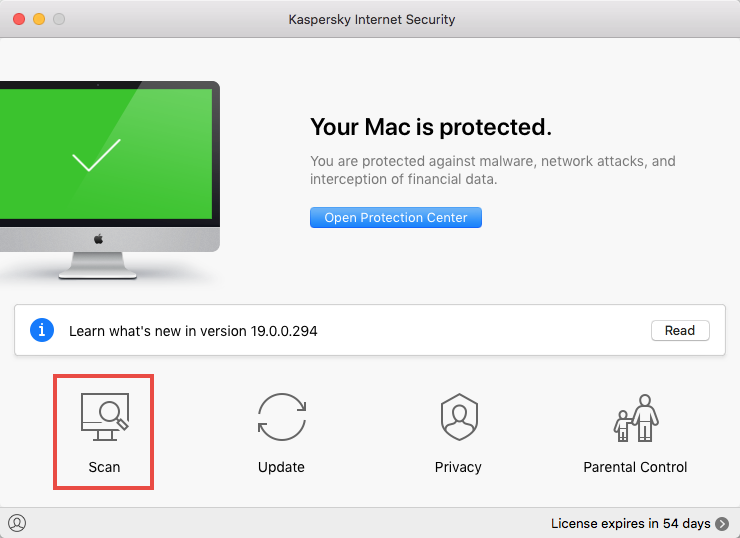
- Click Schedule Scan.
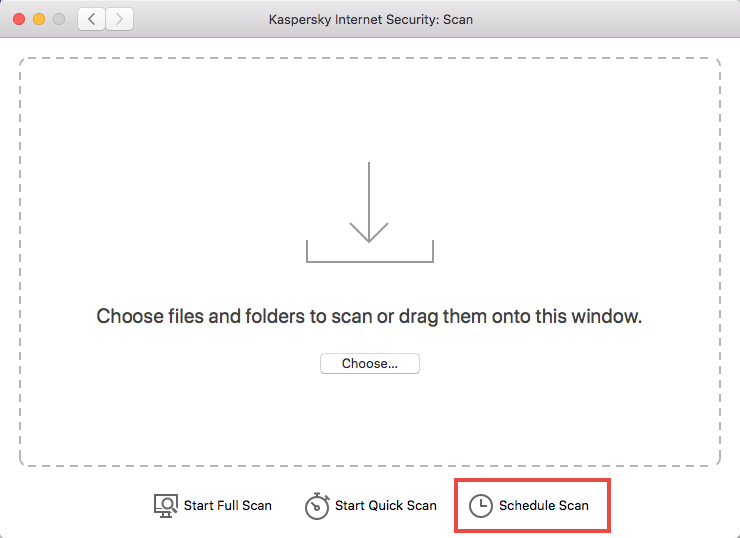
- Set the scan schedule and click OK.
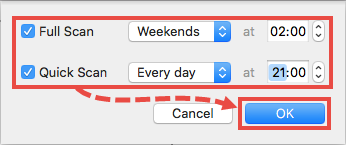
The schedule has been configured and set.
How to view scan results
- Run Kaspersky Internet Security 19 for Mac.
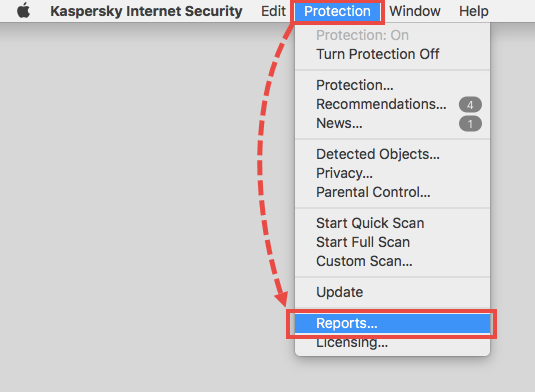
- In the upper-left corner, click Protection → Reports.
- Go to the section and select the scan task.
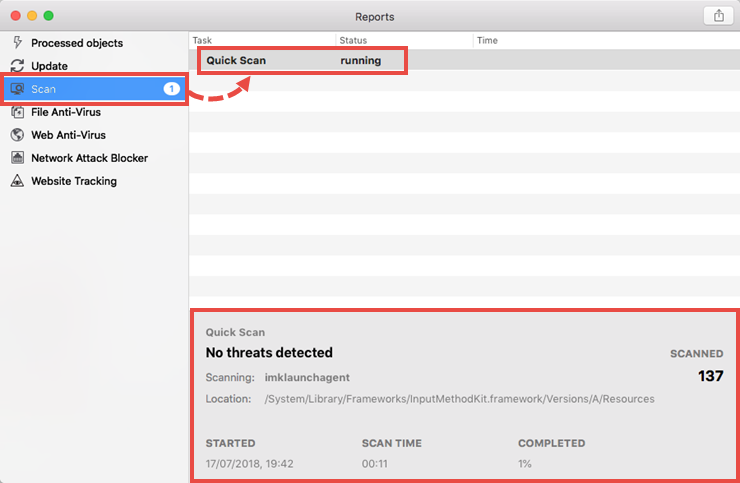
Scan results will be available in the lower part of the window.
